Friday, April 10, 2020

Stampin' Up Ornate Thanks Card Class

Hello Friends,
I am so excited to bring you this awesome class that is OOZING with gratitude!  It features a brand new sneak peek from the upcoming June catalog, The Ornate Thanks Stamp Set!

The designer paper is just gorgeous and you could really pair it up with ANY sentiment stamp set that you have. If you're like me, you need a stack of thank you cards right now.  
You can get the class for free with any order over $27 on my website and use host code: USSU99WX   (Please also register for the class so you get the directions emailed).

Bonus 18 Card Tutorial this month on all orders over $50!  I will email you an 18 Card PDF tutorial, in addition to the class tutorials for all orders over $50 on my website!  This was a collaboration of 18 different demonstrators, one demonstrator per card.  I'm so excited to bring this special opportunity to you!
Packets and/or emailed directions will be mailed this Thursday, April 16th. Get your packets, pre embossed, pre-cut, so all you have to do is stamp, learn the techniques and assemble!  
  • Add on the stamp set to discount the class price.
  • Place a qualifying order ($27 retail or more) in my online store to get the class packet mailed for free. (Please Use Host Code) USSU99WX
  • Add a Wink of Stella Glitter Brush to your card kit and I'll pay your tax and shipping on it.
  • Want extra kits?  I've discounted those too!  
During this crazy time, it is my goal to serve you and help you in any way with your creative hobby!  It is a great way to pass the time while we are at home!

Demonstrators:
 you may offer the sheets for free with any $50 order. The complete supply list and shopping list will be part of the directions. These are my in-class directions sheets and contain full measurements and step by step directions. The photos have not been watermarked and the sheets do not have my name on them, so they are demonstrator friendly to reuse them for a class. 
Recommended supplies to assemble these projects as shown with the packets:
  • 149471 Ornate Thanks Stamp Set
  • Ink Pads: Early Espresso, Old Olive, and Rococo Rose
  • You'll also need:  Wink of Stella, Snail Adhesive, Dimensionals, Glue Dots, Liquid Glue, Paper Snips.
Click here to shop now: on my website, and use host code: USSU99WX
Thursday, April 9, 2020

Make your own Designer Paper with just stamps an ink! Plus an eight card One Sheet Wonder template for you

Hello Friends,

I hope this post finds you safe, happy and thriving!  It has been a crazy month and I do have some classes in the works coming your way!

In the meantime, I did a Free Live video this past Tuesday that I'd love to share with you.  If you are in your craft room and need a place to jump off, you can actually create your OWN designer paper with just some Stamps, Ink and Paper.   In the video, I used the Wild Rose and Beautiful Butterfly stamp sets to do just that!

Here's a peek at that video:


Net I would love to share with you the OSW, One Sheet Wonder that I created after I stamped a whole sheet of 8 1/2" x 11"  When I was done stamping, this is how I cut my paper up:


Next, I created 8 individual cards from that piece of paper that I stamped.  I labeled the photo of the finished card for each of the examples and will list the measurements below.


Card 1 - 

Crumb Cake Base 11 x 4 1/4"
Very Vanilla 5 1/4" x 4"
Early Espresso 4 7/8" x 3 5/8"
Homemade DSP 4 3/4" x 3 1/2"
Punched shape made from layer 2 - using the Label Me Lovely Punch.


Card 2  -

Thick Very Vanilla Base 11 x 4 1/4"
Early Espresso 5" x 3 3/4"
Homemade DSP 4 3/4" x 3 1/2"
Punched shape using the Label Me Lovely Punch

Card 3 - 

Crumb Cake Base 11 x 4 1/4"
Early Espresso 5 1/8" x 3 7/8"
Very Vanilla 5" x 3 3/4"
Homemade DSP 4 3/4" x 1 1/2"


Crumb Cake Base 8 1/2" x 5 1/2", scored and folded at 4 1/4"
Layer 2 Very Vanilla Cardstock DSP 4 x 3 1/2"
8" of ribbon.


Card 5 - 

Thick Very Vanilla Base 11 x 4 1/4"
Early Espresso 4 3/4" 3 1/2"
Very Vanilla DSP (stamped) 4 1/2" x 3 1/4"
Sentiment made from the label me Lovely Punch
Pre-tied bow added with a glue dot


Card 6 - 

Base Layer 8 1/2" x 5 1/2", scored and folded in half
Early Espresso 4 1/4" x 3 1/4"
Very Vanilla 4" x 3"
Very Vanilla (stamped paper to make my own DSP) 2 3/4" square
Ribbon: about 8"


Card 7 - 

Base Layer 8 1/2" x 5 1/2", scored and folded in half
Early Espresso 4 1/4" x 3 1/4"
Very Vanilla 4" x 3"
Very Vanilla (stamped paper to make my own DSP) 2 3/4" square
Ribbon: about 8"


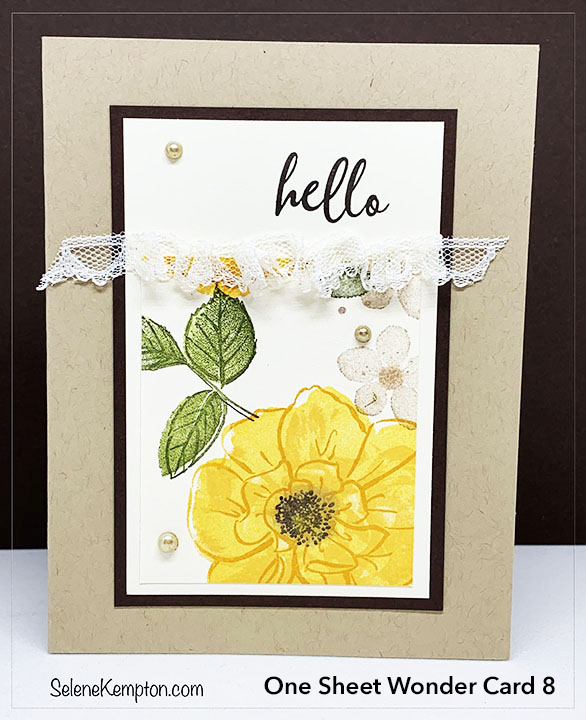
Card 8 - 

Base Layer 8 1/2" x 5 1/2", scored and folded in half
Early Espresso 4 1/2" x 3"
Very Vanilla 4 1/4" x 2 3/4
Very Vanilla (stamped paper to make my own DSP)3" x 2 1/2"
Ribbon: about 8"

I hope you enjoyed the projects as much as I did, and that it inspires you to try your own One Sheet Wonder.   If I've inspired you or if you need some goodies, my current host code is: FV6Z472N


Here is a list of what I used to make these projects:


New Online Schedule

Monday's from 7:30 to 9 PM - Zoom Crafty Meetup. Login to our meeting room, bring a project to work on and your favorite beverage - Cost FREE, More details to follow.

Tuesdays at 3PM Enjoy a live video on FB. I will download the video and share it to youtube for those who are not on Facebook. - Cost FREE As time allows, there more pop up classes like this one above! Let's get crafty and serve others with this great hobby!

Love,
Selene
Tuesday, March 24, 2020

Free Online Pop Up Class from Selene

Hello Friends!

It's been a crazy week or so, and we've been staying in the house like many of you. I was thinking that you may already have what you need to get creative and made this video to help you get started.

Now is the best time to get creative, take your mind off the day. Maybe you can send out cards to friends or family that you are thinking of! It's a great way to serve others and stay connected and sane at the same time!

In the meantime, please enjoy this free class on me!

Measurements for all the projects:
Base 8 1/2" x 5 1/2" scored and folded at 4 1/4"
Layer 2: 5 1/4" x 4"
Layer 3: 5 x 3 3/4"
Free Online Stampin Up Class for you with Selene - Recorded Live
New Online Schedule

Monday's from 7:30 to 9 PM - Zoom Crafty Meetup. Login to our meeting room, bring a project to work on and your favorite beverage - Cost FREE, More details to follow.

Tuesdays at 3PM Enjoy a live video on FB. I will download the video and share it to youtube for those who are not on Facebook. - Cost FREE

As time allows, there more pop up classes like this one above!

Let's get crafty and serve others with this great hobby!

Love,
Selene

Need some supplies? Current Host Code: UYGNJQH4
Stampin' Up Announced a Third Release for Sale A Bration.
Here are the choices you can get FREE with an order.
Tuesday, March 10, 2020

Casing Tuesday and this week's live video Stampin Up Spring & Easter Cards featuring Welcome Easter & Springtime Impressions Dies

Hello Friends! 

I had such a fun morning hanging out with friends on the live video. It's retreat week, so today's video was totally "on the fly" and we made up new cards as we went! I really LOVE the cards we came up with and plan to show them through the week, this week!


Here is a fun card that anyone can make. I cut a butterfly out of the center of a piece of whisper white measuring 4 3/4" x 3 1/2".


Then I layered a piece of the Pleased as Punch designer paper behind the opening (4 x 2 3/4").

Then, I just stuck the die-cut butterfly back in the paper that it came out of and attached a bow. Isn't that sweet?

I copied the layout from Page 10 of the current Sale a bration catalog and turned the sketch.


Here is a copy of the replay: 
I also shared some details about an upcoming milestone and shared that I'm SUPER close to earning the next incentive trip! Maybe this week! So grateful for all of you!

Thank you for stopping by! If you need any of the products from the video, below is a shopping list of what I used.

Love,

Selene


Friday, January 31, 2020

Stampin Up Morning Star Card

Hello Friends!

I have the sweetest card for you today using the Morning Star Stamp Set.  I am in love with the delicate images offered in this set.  So, much so I created a class all around it!  


If you want to get in on this month's class, in person or shipped to your door, you can check it out and/or signup here.


Let's jump right in and give you some measurements:

Card Base: Petal Pink, 8 1/2 x 5 1/2", scored and folded at 4 1/4"
Layer 2: Night of Navy 5 1/8" x 3 7/8"
Layer 3: Whisper White 5 x 3 3/4"
...and don't forget the pretty knot tied on with the GORGEOUS new Petal Pink 1/4" metallic-edged ribbon.

It is super simple stamping.  I used the long vine image to create the cascading vines and just stamped them to connect the images. Such a sweet set to work with.

If you're looking for a shopping list, Below is a list of what I used.  AND if you're placing an order anyway, you may want to check out my class this month and get it for free with your order.

Love that!

Thanks for stopping by today!

Love Selene

Thursday, January 30, 2020

Stampin' Up! Tropical Oasis Memories & More Card Pack Card features No Stamping!


Hello Friends!  

I am sharing this sweet layout from the CASE-ing Tuesday Sketch challenge this week.

I have to say that the cards from the tropical oasis card pack made this card go together in about 10 minutes, from start to finish.

I ran out of linen thread so I cut a single thread off some burlap ribbon to make my twine.  Necessity is the mother of invention! 
Cardstock Measurements:
Card Base: Balmy Blue, 11" X 4 1/4" scored in half at 5 1/2"
Layer 2: Balmy Blue,  5 x 3 3/4", embossed with the coastal weave folder
Layer 3: 3 1/4" x 2 1/4", memories & more card, cut down from 3x4"
Layer 4: Whisper White 4 1/4" x 3/4", with a sticker on top and trimmed

Thank you so much for stopping by today, here is a shopping list of what I used for products.

Love,
Selene

Tuesday, January 28, 2020

Stampin' Up Morning Star Stamping Class

Hello Friends!

I have the most wonderful class to share with you this month, and the colors are making my heart so happy! This class features the Morning Star Stamp Set, featured in the Spring Mini Catalog.  You'll need the stamp set and two inks in order to assemble if you're taking the to-go version.

Want this class for FREE?  That's easy!  

Just purchase any order over $27 (merchandise) at my online store and use host code: EECPPNUG and I'll send you a kit in the mail for FREE!

(Please also register for the class so you get the directions emailed).

When: Thursday, February 6th
  • 9 AM or
  • 6:30 PM
  • To Your Door
Where: In-Person, To Go or Directions Only Options

Register Here!
To GO? You have options, the first three options are shipped to your door.  Directions and packets will be mailed/emailed by 2/13/2020 

Get your packets, pre embossed, pre-cut, so all you have to do is stamp, learn the techniques and assemble!  
  • Include the stamp set to score a sweet deal!
  • Get your pre-cut kit in person or to go.
  • Place an order in my online store to get the class packet mailed for free. (Host Code) EECPPNUG
  • Bonus* Add on the framelits and I'll pay your tax and shipping!
Note: The digital file will also be sent by the 13th also. These are my in-class directions sheets and contain full measurements and step by step directions. The photos have not been watermarked and the sheets do not have my name on them, so they are demonstrator friendly to reuse them for a class. 

Demonstrators: you may offer the sheets for free with any $50 order. The complete supply list and shopping list will be part of the directions.

Recommended supplies to assemble these projects as shown with the packets:
  • 151699 Morning Star Photopolymer Stamp Set
  • Ink Pads: Night of Navy and Petal Pink
  • You'll also need:  Snail Adhesive, Dimensionals, Glue Dots, Liquid Glue, Paper Snips.
I hope you can join me for this month's class in person or I'll ship it to your door!

Click here to shop now: on my website, and use host code: EECPPNUG
Sincerely,
Selene Kempton