Friday, March 30, 2012

Saturday Sketch Challenge 249

Good Evening Friends!

How bout' a clean and simple sketch for you to try this weekend?

Gretchen was at the sketch board this week and boy, did I have fun playing along!  This "Tiny Teacup: comes from the a la carte section of the idea book and catalog.  I cut the "hello" apart from the tea cup and mounted it to the side of the block.  So I can put the hello (or not).

So to get started, how about some measurements:

Base: Marina Mist 11 x 4 1/4", scored in half at 5 1/2"
Layer 2: Basic Black 5 x 3 3/4"
Layer 3:  Whisper White 4 7/8" x 3 5/8"
Layer 4: 4 punched scalloped squares (marina mist)
Layer 5: 4 punched 1 1/4" square punches

I stamped 3 coffee cups and the word "hello" and punched them out with the square punches.  I had a field day embellishing!  I love the little pearls and the sweet little yellow flower.  I used the elegant lines embossing folder on Layer 3.  That's about it!  Just a snippit of black satin ribbon on the top left corner, between the layers and this was a quick, simple and cute card!  Love the sketch!!

Would you like to play along this week?  Head on over to stamping 411 to see what my girlfriends are up to! Thanks for stopping by tonight!

Have a fabulous weekend!

Selene Kempton
Thursday, March 29, 2012

Simple Magnetic Bookmark Tutorial

Good Morning Friends!

This morning I have a cute project tutorial for you.

I made this adorable magnetic bookmark for my little bookworm, Alexis.

I thought you might enjoy a short tutorial on how I made it. 


So, first, to get started I took some designer paper and cut it to 5 x 2 1/4".  I used the sale a bration paper (that will only be available for 2 more days).  

Then I cut some magnet sheets down to 2 1/4" x 2 3/8"
 Peel the self adhesive backing off the stampin up magnet sheets.
 Stick them on the back side of your designer paper, so there's a 1/4" gap in the back.. (look, mine isn't straight, but it doesn't matter). 
 Next, I placed my designer paper face down against the two tags die from Stampin' Up! 
 After it comes out of the big shot, this is what you've got.  Discard the outlined piece or cut that again and use it as magnet pieces.  :)
 Here's a view of the front. 
 Fold the bookmark in half.  (yea it sticks!)
 Here's a view of the folded bookmark from the front.  Now she's ready to decorate!!
 I stamped an "A" on some vanilla card stock and punched it with 1 3/8" circle punch.  I used a scalloped circle below it. 


So here's my supply list
Stamps: Lovely Letters Alphabet 115030
Ink: Riding hood Red Marker 120971
Paper: vanilla 101650, everyday enchantment (free with a $50 order), Riding Hood Red 111348
Accessories: big shot die two tags 115954, self adhesive magnet sheets 119816
1 3/8 circle punch 119860, scallop circle punch 119854, dimensionals, snail adhesive

So I gave her the book mark last night, then took it back so I could show my stamp clubbers.. LOL  too funny!!

If you need any of these items and would like to place an order, you can visit my online store.  Thanks so much for visiting today!
Wednesday, March 28, 2012

Sale A Brate Thanks ~ Only 3 Days Left to Sale A Brate!

Good Morning Friends!

I got a few emails from buddies asking if I was okay.  :)  I've been blogging a bit less, but I've just been a little busy! :)

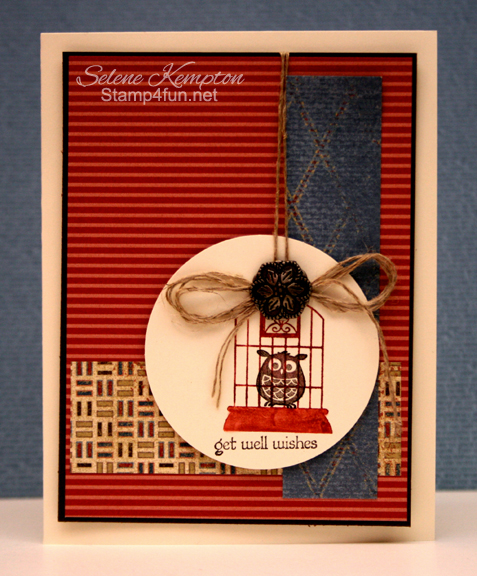
This morning I had a few minutes to play.  I jumped on over to SCS to find the most beautiful sketch.  I wanted a clean and simple thank you card to send to my hostess from last week.

I added a strip of designer paper down the center of my card, embossed the card with my vintage wallpaper embossing folder, then sanded the front of the card to make the embossing pop.

I'm so addicted to the dazzling details glitter glue, at just $2.50 a bottle, I'm putting it on everything!!  I'd probably dab a little on Alexis headed to school if she'd let me!  :)

Can you believe there are only 3 days left for Sale-A-Bration?  Where did the last few months go?  :)  This is one of the fabulous stamp sets you can earn for free with a Sale-A-Bration purchase. 

Rewards!!  Earn a free Sale-A-Bration reward for EVERY $50 you spend on Stampin' Up! products.  Items from my online clearance rack can be included in every on-line order and count toward your total!  Spend $150 or more and you will receive a free tote bag, plus you'll earn hostess benefits!  Qualifying totals exclude shipping and tax and this all ends on March 31st!

Join today!  The stampin up demonstrator kit is only on Sale for 3 more days also!

Who doesn't love a ONE DAY SALE?

I still remember the day I signed up to be a demonstrator. I was getting ready to place a pretty large order, with a few stamp sets and lots of paper. That day, my demonstrator told me that I could save some money if I got the demonstrator starter kit. Then, she showed me how to work my wish list into the kit.

I was so excited!! Every DAY Stampin' Up's demonstrator starter kit IS that ONE DAY SALE. You get $345 for $175. No obligation to do anything else, EVER.  However, once I joined I realized there are many advantages available to you when you join Stampin' Up.  Then, I formed my own stamping group stampers with heART!    
  
There is no better time to test drive being a demonstrator than when the kit is on sale!    

  • 20% (or more, up to 40%) off ALL orders  
  • Monthly Team Meetings
  • FREE Class Planners
  • Monthly Opportunity to swap (in person or long distance)
  • Helping Others 
  • Discounts on ALL your stamping purchases

The Standard Starter Kit is valued at ($345). Just one of the many perks is the 50% product savings on the two Starter Kits.

Both kits are being offered for $125 and shipping is FREE but ONLY until the end of the month. Then it just goes back to being the BEST deal in the book.

So FIRST ~ here's what you get!   
  
Join during the month of March and you get a FREE pack of designer paper or a FREE digital download every month until the end of the year!!

And there's more!!    
Give me a call or send me an email and tell me you want the best deal in the book!  Here's the content of the kit broken down.  WOW!!   

A. STAMPS:
You have choices! You may substitute any current stamp set (wood or clear-mount) of the same price or less as the stamp or standard wheel you are replacing.
  • 3 Wood-Mount Stamp Sets
    115360 For All You Do (p.112) $28.95
    121915 Create-a-Cupcake (p.68) $22.95
    122909 Triple Treat Flower (p.18)$8.95
  • 1 Clear-Mount Stamp Set
    123225 Easy Events (pl.57) $24.95
  • 1 Standard Wheel
    113121 Cupcakes Stampin' Around Wheel (p.23)
B. ACCESSORIES WITH ALTERNATIVE SELECTIONS
  • 118486 Clear Block C (p. 192) OR substitute with any clear block $6.95 or less
  • 117155 Brights Patterns Designer Series Paper Stack (p. 175) OR substitute with your choice of Patterns Designer Series Paper Stack
  • 120954 Getting Started Assorted Color Smooth Card Stock (8.5 x 11, p. 165) OR substitute with any Assorted Color Smooth Card Stock (8.5 x 11)
  • 100730 Whisper White Card Stock (8.5 x 11, p. 169) OR Card Stock 8.5 x 11
  • 114616 Whisper White 5/8" Satin Ribbon (p. 191) OR any ribbon $8.95 or less
  • 102283 VersaMark Pad (p. 195) OR Ink Pad $8.95 or less
  • 101179 Basic Black Classic Stampin' Pad (p. 169) OR any Classic Stampin' Pad
  • 102277 Old Olive Classic Stampin' Pad (p. 166) OR any Classic Stampin' Pad
  • 105216 Pumpkin Pie Classic Stampin' Pad (p. 166) OR any Classic Stampin' Pad
  • 103133 Real Red Classic Stampin' Pad (p. 166) OR any Classic Stampin' Pad
  • 119677 Daffodil Delight Stampin' Write Marker (p. 166) OR any Stampin' Write Marker
  • 119679 Marina Mist Stampin' Write Marker (p. 167) OR any Stampin' Write Marker
  • 119787 Marina Mist Classic Ink Refill (p. 167) OR any ink refill
  • 104332 Snail Adhesive (p. 197) OR any adhesive $6.95 or less
  • 102394 Stampin' Mist (p. 198) OR Stazon Cleaner (109196)
  • 114779 Chocolate Always Bird Décor Elements (p.233) OR Décor Elements $9.95 or less
  • 121807 Cupcake Punch (p.213) OR any punch $23.95 or less
  • 107301 Medium Envelopes (40) (p.182) White OR any envelopes $7.50 or less
  • 120148 Color Coach (P.174) OR multi-language color coach
C. ACCESSORIES WITH NO ALTERNATIVE SELECTIONS:
  • Stampin' Around Standard Self-Inking Handle
  • Uninked Standard Cartridge
  • Single Blender Pen
  • Single Stampin' Sponge
  • Stampin' Scrub
  • Stampin' Dimensionals
  • Décor Elements Applicator Tool
D.  BUSINESS SUPPLIES (no alternative selections)
  • Getting Started DVD
  • Getting Started Guide
  • Guest Invitation Postcards (100)
  • Catalogs (8)
  • Mini Catalogs (8), when available
  • Definitively Decorative Brochure
  • Recruit Folders (5)
  • Recruit Brochures (20)
  • To My Hostess Envelopes (10)
  • Hostess Benefits Forms (10)
  • Project Sample Sheet
  • Hostess Brochures (20)
  • Customer Order Forms (50)

Want to go buy your kit?  Click Here, then select "join the fun" on the top far right.  it's the last category at the top.  Then on the left hand side of the page... Click "Join Now".

If you need my help, please call or email! 

Friday, March 23, 2012

Live in the Sunshine ~ SSC248

Good Evening Friends! 

It's time for another sketch challenge!  Yea!!  I'm steppin out with the honey tonight! Got a sitter and everything so I'm pretty excited. 

We're trying to get out more as a couple.  That's hard to do when you have a little one sometimes.  Although Alexis is getting older, we still don't always make the time. 

I have a friend in from Florida and we're headed out to see a band play.  I'm excited about that too! 

The weather in the northeast has been unseasonably warm.  All the trees and flowers are blooming and it seems like we've skipped spring and moved right into summer!  Don't get me wrong ~ I love it ~ but it's very strange to be at the beach in New England in the middle of March.  All the stores are closed but it's 78 and sunny.  The water temperature is a whopping 40 degrees, so you can catch hypothermia if you go swimming.  Just strange.  Maybe it's from the solar flares that we've been experiencing?

This week's card reflects my mood.  I do better when I have a bit of sunshine during the day.  I've been making an effort to get outside for a little bit every day.  Even if it's just a few minutes.

So how about some measurements?
Base: 11 x 4 1/4", scored and folded in half at 5 1/2" ( so saffron)
Layer 2: 3 1/2 x 4 (soft suede)
Layer 3: 3 1/4" x 3 3/4" Vanilla
Oh and there is a label punch tucked between the base layer and layer 2.  I flipped it the short way, mainly because it fits. :)

I stamped my sunflower image in soft suede then punched a 2 1/2" circle punch out of some scrap paper.  I love the really big sun.  I used the punched piece to make my sun and just sponged in a circular motion using so saffron ink. 

Next, I stamped some grass at the bottom in old olive and sponged some old olive (using a circular motion at the bottom.  I also added some bashful blue ink for the sky (again, just making big circles with my sponge).

Finally, I tied it off with a piece of old olive satin.  Ahhh, feels like summer! 
Thanks for stopping by today.  If you have time, try making a card with this super simple sketch this week. If you want to see what my friends are up to, head on over to stamping 411 for the latest samples made with this sketch! 

Cheers to you!
Selene Kempton
Tuesday, March 20, 2012

Just Because I Love You ~ Lovely As A Tree

Good Evening Friends

Just a quick card share for you today.

I was playing along with some friends over at the chat and challenge today on SUDSOL.  That's a group for demonstrators.  Anyway, there was a sketch challenge.

The original card, following the sketch had some pearls on it.  I removed them.. He just wouldn't "get" why I had the pearls on there.. LOL  This card is a "just because" card for my hubby.  I'll leave it somewhere that he will find it with a little love note inside.  It's been a while since I've had time to do that and it just makes me happy.

Measurements:
Base layer:  so saffron, 11 x 4 1/4", scored in half at 5 1/2"
Layer 2: Espresso 4 1/4" x 2"
Layer 3: Old Olive Grosgrain (retired) ~ I cut the whole with a slot punch which is also retired.  The ribbon is tied all the way around the card and put through a hole at the top.
Layer 4: Whisper white, with the tree stamped in old olive and espresso, then blended with the blender pen.  I punched this out with a 2 1/2" circle punch.
Layer 5: 1/2 whisper white scrap, cut with scissors to get the "v" on either end. 

Very clean, simple and sweet. 
Hugs to you,
Selene Kempton
Monday, March 19, 2012

Mojo Cute Chick

Good Afternoon Friends,

Got a little time to do some stamping today and with the nice weather I'm thinking Easter!

This is for the mojo Monday sketch challenge.

What a great little chick from the everybunny stamp set.  Today, I am a woman with few words (that never happens) so I'm just going to go with it!

I hope you're having a wonderful day!
Friday, March 16, 2012

Inspired Birthday ~ SSC247

Inspiration can come from anywhere and I can honestly say that I feel like I have good days and bad ones just like anyone else.  I've been very busy bee and this morning when I got up, I felt like I got hit by a truck.

A trip to the nail salon for some finger and toe pretty-fication and I feel a lot better.  When I got home however, I was still dragging on a card idea for tonight.  Do you ever have those days?

Now, I can tell you that this card for me is jaw dropping gorgeousness, but it's a direct reflection of my work over the past few weeks.

Last night I had a workshop for 25.  I prepped for 27 and 22 showed up!  It was total crazy stamping fun, but it was insane.  MOST of the people there had never touched a stamp so it was also a challenge!  Lucky for me I had my friend and downline Christine there for an extra pair of hands or I'd be singing a different song this morning! ;-)

So I'm going to share the dimensions like normal for my "Friday Sketch" post, but I'd also like to share with you a bit of the creative journey on how I put this card together in less than 30 minutes and on NO mojo!  :)

So first how about some measurements:
Base Layer 8 1/2" x 5 1/2", scored and folded in half at 4 1/4"
Layer 2: 5 x 3 3/4" basic black
Layer 3: 4 7/8" x 3 5/8" whisper white
Layer 4: 2 5/8 x 3" (rounded corners)
Layer 5: 2 1/2" square, rounded corners, stamped first, then embossed
Layer 6: punched happy birthday. 

I really felt that this stamp set, Elementary Elegance was not my style... My friend Gina ended up ordering two and she gave me one.  I made one card for stamp club, and now I cant seem to put this stamp set down!  This card seriously makes my heart beat a little faster, and to think I felt like I had no mojo today!  :)

So, here is my original card club design.
Pretty simple really, it's all Very Vanilla and soft suede.  The butterflies are stamped in crumb cake.
The big thing to remember if you're going to try this one, is to stamp before you emboss!  :)

Then, I had that massive workshop.  At those workshops we make 9 cards, so I felt the third design had too many steps if that many people needed to make the cards within a reasonable amount of time.  :)  (we had so much fun).  So, here's the cards we did at Lydia's party last night.  Each guest could choose pink or blue and they cut their own ribbon off the roll.


So ~ today, when I stepped into my studio, tired... i just grabbed some leftover packets and started having fun!  I really dig the card that resulted from the 411's cool sketch this week!


Have you been playing with a design that you could so "CASE" yourself?  :) Try out a sketch challenge!  Please join me and the stamping 411 operators for some stampin fun!  :)

Have a great weekend!
Selene~

Thursday, March 15, 2012

Birthday Card for JoAnne

I'm holding off on this post so my friend "Jo" doesn't see it.  Her birthday was yesterday, and I've been working SO hard, I hadn't made her a card yet.  Today is the day!

Jo is the friend who helps me photograph my class planners.  She's here whenever I need her even though she's a busy little bee herself!  My favorite thing about being a Stampin' Up! demonstrators is the relationships I've made.  Jo has been a customer since almost the beginning of my demonstratorship and this year she joined my team.  What an amazing shift it has been for the both of us.  Now she's looking forward to starting her first club.  That's the best news ever.

So ~ I went to a sketch on split coast stampers and here's what I came up with!
I used the doily die, and cut it down to fit the sketch.  I made a flower from 5th avenue floral. Stamped it on shimmer white and water colored it with markers and an aqua painter.
I don't have very much to give her, but I did get the new die to show off to my clubs.  I gave her this petite purse and some matching brads for her upcoming workshop.  This gives you a good idea how little this purse actually is.. so cute!

 Here's a view of the purse and the card together.  I love the little bow, it totally makes the purse!  I added it with a glue dot.

 Finally, I made a coordinating envelope with my score tool diagonal plate.  I added tombo multipurpose adhesive and let it dry, then sealed the envelope.

Both the two way glue pen, and the multipurpose adhesive (in the green tube) are two-way.  That means, if you put it on and stick right away it's there forever.  if you wait till the glue dries and then seal is temporary..  Love that!! 
Time is NOT on my side today.  I have a workshop for 25 people this evening.  So, I'm just going to have to leave it there!  I hope you have some time to do some stamping today!

Remember, it's almost Friday!!  

Hugs,
Selene Kemptong
Tuesday, March 13, 2012

Mojo Monday on Tuesday

Good Morning Friends!

I vowed to get a card up on my blog this morning and I made it!  It's still morning!  I have been doing lots of stamping parties and just have been crazy busy, which is a blessing!  :)

As I walked through the grocery store this morning there were two different types of music playing.  The one on the overhead speaker, then there was a tiny little boom box BLARING some Irish music.  (Turn one off please  LOL). 

As a first generation Irish-American, I had a little chuckle and thought it would be nice to finally get the answer to the age old question...

Yes, why do they call it the "Irish Hour" when the music goes on all day? 

My mom would listen all weekend!  I chuckled through the rest of the store with a great big smile on my face.  I'm sure some folks were wondering why I was smiling.  A little joke can keep me laughing all day.  :)

It carried over when I got home.  All my St. Patricks Day cards went to the florist for sale.  People have been requesting St. Patrick's day cards.  Therefore, I have an Irish owl to share today.  As soon as the glitter dries, this one is going to my mom.

I am planning to have a FANTABULOUS St Patricks Day!!  I'm starting it off with an open house here!  I'll be selling every retired stamp set I own for a fraction of what I paid for it!   I've seen some of what's coming up, and I need to make some room!  If you're local to me, come on by and take a peek through what I've got!  The open house will run from 11-3.  I hope you can make it.

If you're a club member, Lucky You!  You can come by on Friday and be the first to pick through my goodies!  So exciting!! 

So how about some measurements?

Base:  8 1/2" x 5 1/2", scored and folded in half at 4 1/4"
Layer 2: garden green 5 1/8" x 3 7/8"
Layer 3: Vanilla 5 x 3 3/4"
Layer 4: Twitterpatted DSP 3 3/4" square. 
Layer 5: 3 1/2" x 1 garden green
Layer 6: twitterpatted 2 5/8" x 2 1/8"
Layer 7: Garden green 2 1/2" x 2"
Layer 8: vanilla 2 3/8 x 1 7/8"

That's all for today!  I hope you walk around with a smile today. 

Talk to you soon!
Selene~

Friday, March 9, 2012

Saturday Sketch Challenge 246

Hello Friends!
Thanks for popping by!  I was SO late with getting the post done over on stamping 411, sorry about that!  Life has been crazy this week!  It was totally fun to sit and get some stamping time in.  
Since I'm running behind I'm going to get down to the details!  :)
First, here is the cool looking sketch!  I love that moon outside the frame.

Measurements:
Base Layer: Old Olive 5 1/2" x 8 1/2",scored and folded at 4 1/4"
Layer 2:  Blushing Bride 4 1/4" square
Layer 3: Crumb Cake Taffeta ribbon 3/8" 
Layer 4: Early Espresso 3 5/8 x 5
Layer 5: Crumb Cake 3 1/2 x 4 7/8

So ~ first I embossed the crumb cake layer (layer 5) with my rose embossing folder.  I took a few drops of reinker and put it on a plastic zip lock bag (i used old olive and regal rose reinkers). If you were going to make it, next you would take your aquapainter and make a puddle of water on the plastic bag.  drag in a tiny amount of reinker to make your watery paint.  Note: you can always add more, go easy on the ink.
I started with the olive, making my leaves... Then added the rose color every where else.  Don't be fussy.. Just swoosh it on there and let it dry.  While I was waiting for that to dry, I started to distress my espresso layer (which was the same side.  I ripped the top off my paper, then ripped the whole right side.  Crumple it a ball and uncrumple a few times (until you feel better).. lol

Once the crumb cake layer is dry you can do the same to the edges.  have some fun.  When paper really breaks down, try lifting a layer off the back a little, this will make it easier for your edges to roll up.

That's it!  stamp a sentiment, punch it out and you're good to go!  I also painted the crumb cake layer for the sentiment with the pink reinker.. Makes it kind of look like rose gold.  My mom has a bunch of that stuff.. Isn't it cool?

At the end I added some of my new bff dazzling details glitter.  I added three blobs to each of the flowers and one on top of the i in Birthday.. So sweet.  An unexpected phenomenon happened.  my glitter turned white and looks like little pearls in real life.. Love that!

Please check out our main page for the sketch challenge over on 411.  The girls made some AMAZING cards this week!  Hope to see you!

Hope you have a wonderful weekend. I had "one of those weeks" so I'm planning to have a stellar weekend!  Only one way to go from here!

Cheers!
Selene
Tuesday, March 6, 2012

Aviary ~ Never been inked

Good Evening Friends!

When I saw the sketch over on split coast tonight, and I'm WIDE awake when the rest of the house is sleeping, I thought it was a good time to make a card for my friends son Carter.

This talented young musician plays both the guitar and harmonica.. (maybe I should buy the set with the guitar).  

Carter is currently suffering from a brain injury due to a car crash about two months ago.  Although Carter is much older now, (20) I remember him as a little kid, not much older than Alexis.  My heart goes out to him and his family during this rough patch while he makes a full recovery.

He was driving home from a job interview, when he turned down a road and lost control of his car.  He is now able to eat on his own, which is HUGE and although the road ahead is long, he's expected to make a full recovery.

Now that he's older, I'm thinking this card is a bit young for him, but I did manage to keep it masculine.  I've never inked my Aviary set.  I wonder if being in there and fighting to get out is a little bit like this guy trying to get out of his cage. He's actually able to reason, and sing in harmony.  I expect at some point he'll just get up and walk out of that hospital, and I pray that he can do that soon.

So ~ please tell me what you think.  Is this too young for the (boy) that I remember that's now all grown up?

Hugs,
Selene~

Monday, March 5, 2012

Cheryl's Stamping Workshop ~ Paper Players Challenge Cards

I'm very much looking forward to my buddy Cheryl's stamping workshop this week!  I had one more design to come up with this morning.  I love doing challenges as a jumping off point.  I also need to keep these cards on the simple side.  We're meeting late (7 PM) and each of the guests at her workshop will be making 9 cards.  Simple is essential, especially if they are working the next day. :)
 So, for starters, we're making 3 of this above card.  So springy and beautiful! 

Then we are going to make 3 of this above card.  Guest will be able to choose between blushing bride and baja breeze.

Finally, we're going to make a trio of cards using the BEAUTIFUL sale a bration papers!
Guests will be able to choose any sentiment from teeny tiny wishes.


So All of these cards fit the challenge over on the paper players this week.  Thanks girls for getting me to think spring!  

Now, for my local girls, because my hostess Cheryl has more than 6 people coming, she won't pay for her set of cards!  

Isn't that fabulous?  Would you like to have a girls night out too?  Call me to get on my schedule and we'll have a blast at your girls night out!

See you soon!
Selene~


Delish Mojo Birthday

Good Morning Friends,

I love a good sketch challenge first thing in the morning.  I took some serious liberties with this sketch but I had a ball layering and playing. 

I used the framlit "labels" die to make both the "circle pattern from the sketch on the top right and for the ice cream cone.  I embossed this with vanilla embossing powder.  I love how this scent stays with me as I make my way around the house.  I love vanilla period!  Some would say that this is a masculine color set, but I like to think of it as more "natural" colors.  I love my vanilla in general, and who doesn't love a red oozing cherry on top of everything?  :)

I made a faux bow with the vanilla seam binding and hit it with the heat gun a bit to get it to playfully crinkle. I just had a ball playing and wanted to share.  I think I got a pretty good shot of the glitter on top of the cherry.  This is the dazzling details.  It makes any cherry or heart REALLY pop and sparkle!  Love that!!  It does need a bit of drying time, but it's $2.50 worth of happiness on so many projects!  :)

So I made my first coordinating envelope!  It took all of 30 seconds with my new Simply Scored Diagonal Plate.  The add on for the Simply Scored (item 122334), comes with the directions to make the most popular sized envelopes.  If you used designer paper, it will automatically be lined with a coordinating pattern!

To seal these types of envelopes, use a permanent adhesive for the bottom parts.  For the flap, look at what glue's you already have on hand.

Stampin' up has a two-way glue pen, and the tombo multipurpose adhesive is two-way as well.   This means it has two uses.  If you put it on and seal right away, it's permanent.  If you let it dry before you seal it up, it's temporary.  It would be a nice way to seal up these envelopes  so you can get back in later if you need to.  If you're not sure about your glue, try looking at the packaging.

That's all for today!  I hope you have a fabulous week!  I'll be in the studio all week getting ready for a BIG workshop on Thursday (15 ladies)  Yea!!

Rubbah hugs,
Selene~
Saturday, March 3, 2012

Love & Laughter

Good Morning Friends! 

I had a ball yesterday afternoon making this quick card.  Yes, it went together in about 15 minutes!  I took part in a chat and challenge over on Sudsol. Sudsol is a demonstrator only forum that has chats, challenges, great artwork sharing and more. 

I came into the room kind of late. 45 minutes late, and I DID have my card made within time.  :)  Not too shabby! 

So how about some details?

Measurements:
Base: 4 1/4" x 8 1/2" scored in half at 4 1/4"
Layer 2: whisper white 4" square
Layer 3:  3 7/8"  square Mocha Morning Specialty Paper (black flocked pattern)
Layer 4: 1 1/2" whisper white, with the eyelet border punch
Layer 5: the same pattern of dsp flipped 1" x 4 1/4"
Layer 6: Stamped "i do" image from the Love and Laughter Stamp Set
Layer 7: Congratulations banner from the same set.  The rose red flowers come from the bitty shapes punch pack.  I used a mat pack to push a hole in the middle then I added our silver mini brads.  they are so delicate to work with!  I love how they dress up this wedding card!

I used a retired slot punch to punch a hole in the top of my card to make it easy to run my 5/8" satin ribbon through and tie a bow. 

Hard to imagine that it went together in 15 minutes, but that my friends is the power of a cool sketch!  This card is going to be a wonderful card to give to my husbands cousin who is getting married in two weeks.  Check!, one less thing is always good! 

Thanks for stopping by today, and if you love what you see, please leave me a message.  If you don't have a demonstrator and would like to place an order, you may do so here!  Thanks for popping by!

{hugs to you}
Selene Kempton
Friday, March 2, 2012

Saturday Sketch challenge 245 ~ Plant Hope

Good Evening Friends!

It's my favorite time of the week!  Sketch challenge time!  I was a little late turning my card in this week.  Honestly, I struggled with this sketch, but I'm glad I took the time to work it out because I love this card!

Thanks for the challenge Gretchen!  I've just started playing with the wood sheets from Stampin' Up! (in with the big shot stuff in the book) and I'm DIGGING how cool they are on cards!

So ~ I'm going to start with measurements (while they are fresh in my mind).

Base Layer 8 1/2" x 5 1/2", scored and folded in half at 4 1/4" (early espresso)
Layer 2: Cajun Craze 4 x 5 1/4"
Layer 3: 4 x 2" Well Worn Designer Series paper
Layer 4 & 6: 2 1/4" x 2 7/8" early espresso
Layer 5 & 7: 2 1/8 x 2 3/4" wood sheets  {love these}
Layer 8: very vanilla seam binding.  (i havent used seam binding in a long time and forgot how much I love it!  It's so shimmery and beautiful.  I also used a vintage brad to make a faux bow.  I fed the brad right thru to layer 2 and opened the prongs in the back to secure it in the card.
Layer 9: 1" circle punch (early espresso) up on a dimensional
Layer 10: Modern Label punch (the sentiment comes with the tree set Plant Hope)  this was stamped on a wood sheet and punched out with ease :D

I used Artichoke and Espresso markers to ink up my image, and the background wood grain (117100) on the second panel (on the right) is just fabulous as an accent with the Plant Hope Stamp Set!

A note about stamping on the wood sheets... I did notice that the ink comes out a bit smudgy, but it's the nature of the material.  It's supposed to look like wood, and these sheets take on wood's attributes.  That sounded funny.. LOL 

If you have some time this week to play along I cant wait to see what you come up with!  I'll be watching over there and waiting to leave you a comment.  Thanks for stopping by tonight!

Until Tomorrow!

{hugs}
Selene~
Thursday, March 1, 2012

Simply Scored Diagonal Plate!

Good Morning!

It's finally here!

Good Morning!  I've been waiting to share with you this wonderful video from the home office on our new Simply Scored Diagonal Plate.

For those of you who already own the score tool, I've heard nothing but rave reviews!    This is going to be so fun!! 


Product Features:  
Click here to order your Simply Scored Diagonal Plate today!  :) 

(((hugs)))
Selene