Welcome to the Grand Vacation Achievers Blog Hop! This time around we are making projects that were inspired by our pillow gifts on the Stampin' Up! incentive trip to Hawaii in May. If you are coming here in order, you came from
Kylie Bertucci's blog. Wasn't her project super cool?
I will admit, that when I got home my mojo was still somewhere on the Hawaiian Shoreline. Stampin' Up always knows how to spoil us. I will quote my sweet hubby, Brian here:

"If more people had the chance to earn an incentive trip just once, they would never want to miss another one!"
Here's a wonderful photo of Brian, sporting his Maui Jim's from the Alaska cruise. We were on our way downstairs to the welcome dinner, to pick up yet another pair of shades!
I really love how we got to pick the ones we wanted and they didn't just issue the same pair to every one of us. I love even MORE that my hubby was rewarded for all that he does to help me through the year, and he really does help me. From being the punch-master-fixer, to scoring paper or punching little flowers, my guy does it all!
~~
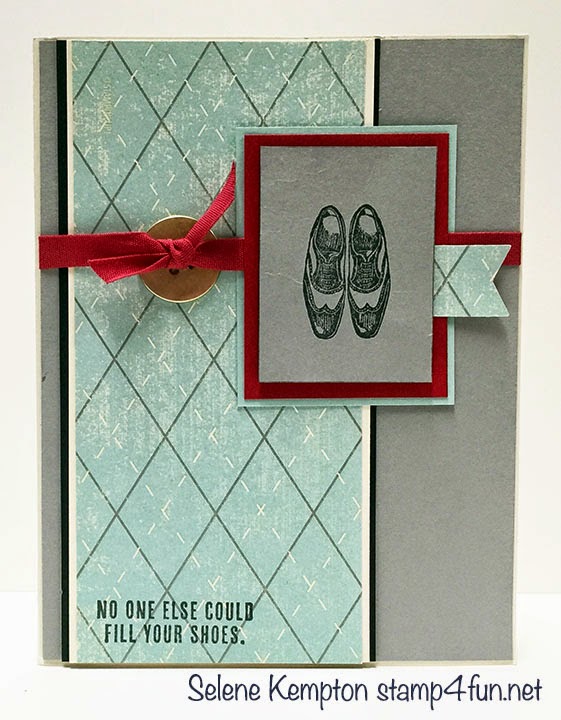
So when I got home, I really wanted to use something from the sunglass theme, and I had tucked these away in my bag. The 2015 logo appeared on so many things of what we received, I decided to use this card to inspire me for my project today.
So here is my project share for today. I started by grabbing a stamp set that I preordered from the catalog, and it arrived home the same day I did. It's the "I Think You're Great" Stamp Set from Stampin' Up! and it goes live for Sale on June 2nd. Demonstrators can get theirs early during the preorder that is currently going strong.
I started by stamping the sentiment over and over, with different color combinations. I wanted to have a subtle pattern in the background. Here's a closer look at that background. I just stamped BOTH the sentiment, and the super cute floral looking pattern in the new Watermelon Wonder color, and kissed them together before stamping it on my Whisper White Card Stock.
This image marries up nicely with the 1 3/4 inch circle punch. When I got to the next step I wanted a scalloped circle underneath it, but my scalloped circle ended up being the same exact size. So, this was my "fix" to that issue. I just cut my scalloped circle in half and used it to frame the piece above.
Next, I wanted to scrunch up my ribbon for a more vintage feel. So, I used my fast fuse to make a line of adhesive down where the Designer Paper met my card stock and then just took a piece of ribbon and pinched it every 1/4" inch or so until I got to the end of the front of my card stock.
To secure it, I could have pulled out the sewing machine, but I decided on a nice piece of bakers twine to keep it simple! I tied the bakers twine around twice and tied it up with a bow. You could easily use a knot and it would look great too!
So here are some measurements and supplies if you're looking to recreate this.
Wish List:
Stamps: I Think You're Great Wood 138712 / Clear 139868
Ink: Watermelon Wonder Ink Pad 138323
Paper:
Whisper White Card Stock
Tip Top Taupe Card Stock 138336
Watermelon Wonder Card Stock 138334
In Color Envelope Paper (in place of designer paper, page 149 of the new catalog) 138312
Accessories:
Watermelon Wonder Dotted Lace Trim 138428
Bakers Twine, Whisper White 124262
Self Adhesive Pearls 119247
Itty Bitty Accents Flower Punch 133787
Measurements:
Base Layer: Whisper White 8 1/2 x 5 1/2"
Layer 2: Watermelon Wonder 5 1/8" x 3 7/8"
Layer 3: Tip Top Taupe (embossed with the Decorative Dots Embossing Folder) 5 x 3 3/4"
Layer 4: Envelope paper 1 1/2" x 3 3/4"
Layer 5: 12" of Dotted lace trim
Layer 6: Bakers Twine
Layer 7: Whisper White 1 3/4" scalloped Punch, cut in half and adhered to the bottom of layer 8.
Layer 8: Sentiment, punched with 1 3/4" circle punch!
So, If you're still reading, I thought I'd show you which sunglasses we picked! I feel so totally blessed by my friends who make dreams like these possible. Traveling with Stampin' Up! is an amazing way to see the world because everywhere you go on vacation, you run into a friend that you happen to know! Thank you BIG TIME, to my awesome team of demonstrators and customers that are all really more like extended family.
I can't wait to see what the rest of my friends have come up with! Continuing on the blog hop path, I get to introduce you to my super talented friend
Connie Stewart!!
I can't wait to see what she has cooked up for us!


 Love,
Love,