Showing posts with label clean and simple. Show all posts
Friday, August 18, 2017

8/18 Stampin' Up Just Add Text and a Daisy Punch! #FridayFun


Hello Friends,

I am so excited to be sharing a card from my workshop this week.  I do love sitting with friends doing crafts and spending time together.  This particular group I meet with them every single month, and they totally bless me.  I love how Stampin' Up brings that into my life and theirs.  This card was a big hit at the gathering this month, and I love how simple it is!  I'll post this week's video at the bottom, but first how about some measurements so you can recreate it if you like.

Here are the colors I used.


Measurements: 
Base: Crumb Cake 8 1/2" x 5 1/2", scored and folded in half at 4 1/4"
Layer 2: Melon Mambo, 5 1/8" x 3 7/8"
Layer 3: Crumb Cake, 5 x 3 3/4"
Layer 4: Melon Mambo 3" square, die cut with the stitched framelits die
Layer 5 & 6: Two Daisies, punched from the Stampin' Up! daisy punch
Layer 7: Daffodil Delight 3/4" circle, popped up with a dimensional
Layer 8: Glitter enamel Dot

The video this week is very short, only about 5 minutes, but I talk about some really cool design concepts including framing things by making sure that 3 sides are equal, and the rule of thirds.  

Thanks for checking it out!  

Love,
Selene


If you loved this project and need some things, my host code for this month is: FFFR4PQH  
Of course I mail a thank you card for every online order that uses this code!

The clearance rack has been updated and there are some crazy sales going on!  Here are the products I used to create this card.


Thursday, September 17, 2015

Stampin' Up! Card Class Snow Place, Online, To Go, or In person

Join me for the Snow Place Card class.  I am SO excited about this amazing card class!   I had so much fun making it.  Pricing is the SAME for in person or to-go.  Make these 4 gorgeous cards for only $15. Class fee is waived with a minimum order. 
Three Options!

In person: at 9 AM or 6 PM, Thursday October 8th.
To Go: Same price $15 or waived with a minimum order.  Just place your online order on my website of more than $25 merchandise, and use host code  FFCK6AM3.
I'll mail you the packets and email directions next week (by Oct 15).  Please note** Do Not Choose - No Contact - when you place your order.  So I can see where to ship your packets!  :) I cannot see who is ordering when your online account is set up with no contact.

Online:
  Receive the printable PDF directions, and video directions by Aug 14th for all the cards with complete supply and shopping lists for only $10 ~
If you want the packets to go, it's only $5 more (no brainer!)  **US shipping only on that please.
Note. digital file will also be sent by the 15th also  These are my in-class directions sheets and contain full measurments and step by step directions. The photos have not been watermarked and the sheets do not have my name on them, so they are demonstrator friendly to reuse them for a class.  You may offer the sheets for free with any $50 order.
Complete supply list and shopping list will be part of the directions.
Recommended supplies to assemble these projects as shown with the packets:
Stamps: 139738 Snow Place Photopolymer Stamp Set   $26
** Note, there's a bundle for this stamp set, but all the packets have been precut and embossed with all the pieces you need to assemble these 4 projects when taking the class to go.  However, you get a 15% discount when you get them together.  If you would like that, the item number is:
140844 Snow Friends Bundle $45
Ink: 132708 Momento Black Ink Pad
126949 Real Red Ink Pad
126973 Garden Green  Ink Pad (any green ink pad could be substituted, but I love this color for this set.)
Real Red Marker, Basic Black Marker and Pumpkin Pie Marker for the nose. 

For To Go packet customers all cardstock will be prepunched, precut, scored to make assembly as simple as possible.

Friday, March 13, 2015

3/13 Stampin Up Forever Florals Clean and Simple card, featuring the Incolor Accessory Pack

Hello Friends!

I can't seem to put the Blackberry Bliss color down!  Here is another clean and simple card, using the in color accessory pack with some super clean and beautiful images from the Forever Florals Stamp Set.

I started with my base layer measuring 11 x 4 1/4" and it's scored in half at 5 1/2"
Layer 2: Blackberry Bliss, 5 1/8" x 3 7/8"
Layer 3: Whisper White, 5 x 3 3/4"
Layer 4: Two pieces of the double thick twine from the in color accessory pack (available till march 31)
Layer 5: blackberry bliss 3 1/8 x 2 5/8"
Layer 6: Whisper white 3 x 2 1/2"

Some notes about getting the twine to stay, i just used my handy dandy, fast fuse adhesive.  Then, I tied a loose bow, and glued it with tombo liquid glue and just let it set up before I moved it. 

Thank you so much for stopping by today!


Love,
Selene Kempton
Stampin' Up! Creative Coach

Thank you for your orders with me  Shop here anytime!
Click here to join my team


Built for Free Using: My Stampin Blog
Thursday, March 12, 2015

3/12 Stampin' Up! Flower Patch, Clean and Simple, Stamps, Ink & Paper


Some days you just need simple.
I stepped out into my stamp room looking for some pin worthy inspiration,  and admittedly, I'm a little under the weather.  

What do you take for a headache? 

I personally, retreat to my craft room for some stamps, ink and paper.  

This week I'll be celebrating 9 years of creating with Stampin' Up!, and I'm really very grateful for so much.  Mainly, I am so grateful for the relationships that I don't know what I'd do with out.  You all know who you are.  

So very grateful, and how appropriate is this sentiment?  

This card was SO EASY to put together.  I'll give you some simple measurements, and instructions and call it a day. 

First, cut a piece of whisper white to 5 x 3 3/4".  Stamp the sentiment on the bottom left hand side of the card, then add three flowers (all in blackberry bliss ink).  

Layer that on top of a piece of Blackberry Bliss cardstock cut to 5 3/8 x 4 1/8".

And layer it one more time, on a card base 5 1/4" x 4 1/2".

I added some of the incolor pack buttons, with self adhesive pearls on top.  

This is an awesome saleabration bundle, where you can get the buttons for free!  

Thank you so much for stopping by today!  I'm so grateful to be able to share with you.  If you are looking for any of the items I used, there is a complete shopping list below.

Love,
Selene Kempton
Stampin' Up! Creative Coach

Thank you for your orders with me  Shop here anytime!
Click here to join my team


Built for Free Using: My Stampin Blog
Thursday, February 19, 2015

2/19 Stampin Up, Guy Greetings, 40 Days of Kindness

Good Afternoon Friends,

Yesterday was Ash Wednesday.  I had been thinking about what I might give up for the 40 day's of lent season leading up to Easter.  I found an article online about a lady who did it all backwards last year.  Sounds kind of fun to me actually so I took a peek.  Here's a link if you're interested.  

The idea is simple, instead of giving something up, she suggested we should take something on.  And a lightbulb went off in my head.  Honestly, it's not unlike me to drop a card in the mail, or put a package out to a friend who might be struggling with something, but to do it every.single.day. for 40 days.  That is a challenge. 

The idea just came to me yesterday, and I had a dinner date with my family at our favorite sushi place, so I decided that our favorite waiter (the one we always get), was going to get this unused card with an envelope and a note with his tip.  That is my day 1.  I got a chuckle to see the look on his face.  He looked it over very carefully and his eyes lit up.  To understand that someone appreciates him.  It was simple but very cool.  It truly is the little things and I'm going to keep this going every single day.  Some days I may do just one thing, and others I may send two or three, but I will do it every day until Easter.  Hopefully, I'll be able to bless some folks around me and watch them, as they know how much I appreciate them and maybe, just maybe make the world around me a little easier or kinder. 

The card is one from my birthday stamp a stack last month.  My husband Brian actually helped me design this masculine card.  I wouldn't have made the same choices without him, but I love it!  He said "Guy's are simple ~ you cant keep adding stuff.. " and so we sat down and designed this beauty.  Here are some measurements if you need them. 

Base: Vanilla, 8 1/2 x 5 1/2", scored and folded in half at 4 1/4"
Layer 2: Basic Black 5 1/8" x 3 7/8"
Layer 3: Vanilla, 5 x 3 3/4
Layer 4: Newsprint 3 3/4 x 2 1/2"
Then just a few scraps for the layers on top.  I especially like the ribbon that isn't where the seam is, it's down a bit, like a belt on a pair of dress slacks.


Thanks so much for dropping by today and if you need it there is a shopping list at the bottom of this post that shows what I used.  Please make it a great day!


Love,
Selene Kempton
Stampin' Up! Creative Coach

Thank you for your orders with me  Shop here anytime!
Click here to join my team

Built for Free Using: My Stampin Blog
Monday, September 9, 2013

9/9 Stampin' Up! Special Season Christmas Card

Good Evening Friends,

My post is a little late today.  On a personal note, the first full week of school was last week, but I have a feeling that this week is going to be a little more intense for my 3rd grader who is quickly realizing that everything that you want to do well is going to take a little bit of elbow grease.  Today is her first day back to dance, she's taking 4 classes this year.  I'm praying that it's not too much for her to handle and tackle her studies too. She has good study habits when she chooses to apply herself. 

Some day's it's hard for all of us to find that get up and go!  So now, I get a few moments to myself and the opportunity to share today's stamping inspiration with you. 


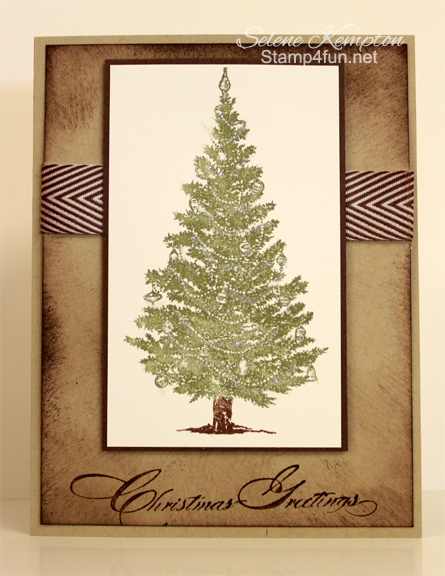
In the spirit of "old school hard work" I thought I'd share this gorgeous, vintage feeling card.  Although the chevron ribbon updates it a little, wouldn't you say? 
Super clean and simple, here are some measurements:
Base layer: Crumb Cake Card Stock 5 1/2" x 8 1/2", scored and folded in half at 4 1/4"
Layer 2: Crumb Cake Card Stock 5 1/4" x 4" (same color, but sponged with Chocolate chip ink)
Layer 3: 6" piece of Chocolate chip Chevron Ribbon
Layer 4: Chocolate Chip 4 1/4" x 2 1/4"
Layer 5: Whisper white 4 1/8" x 2 1/8"

The beautiful Christmas Tree comes from the Special Season Stamp Set, and was inked with artichoke and chocolate chip markers.  To make it easy, I stamped the sentiment (same stamp set) from the chocolate chip ink pad.  Here's a peek at this gorgeous Special Season Stamp Set.


I added 2-way glue to the areas that I wanted to catch some glitter, then added dazzling diamonds to the old school lamps that are on this pretty tree. 

So, I had a few people ask about ordering from my blog and on my site.  When you hover and click on any of the products above, it will transport you to my stampin up store.  I try and make it easy for those who want to order to be just a click away.  Thanks to all of you who have chosen me to be your Stampin' Up demonstrator, for those who visit daily, and for everyone who leaves me a little encouragement (comments).  You inspire me to keep posting, so thank you!!  I am very grateful to you all.

That's my little bit of inspiration for today.  Thanks for visiting!

Love,


Selene Kempton
Sunday, September 1, 2013

9/1 Stampin up Simply Sunday, Color Me Christmas and Christmas Messages Stamps

Good Morning Friends!

It's so dark in the studio today that I'm having trouble getting a nice clean shot of this GORGEOUS clean and simple card!  Please forgive the photo.  I hope you can get the details! 

The card features the Color Me Christmas Stamp Set paired up with Christmas Messages Sentiment Stamp Set.  Totally cute!!
 
So, let's jump right in with measurements
Layer 2: Cherry cobbler card stock, 4 1/4" x 1 1/4"
Layer 3: Cherry Cobbler Striped DSP, (from the paper stack) 4 1/4  x 1"
Top layer is whisper white scrap
And about 16" of the 5/8" organza from Stampin up!

So super simple!!
I stamped the sentiment first, and the present next.  All with Cherry cobbler and black markers.  
Then I stamped a present on scrap, colored it in, cut it out with a white border!    

That's my little bit of inspiration for you for today!  I hope you make it a great day!

Love, 
Selene Kempton

Friday, August 30, 2013

8/30 Stampin' Up! Vintage Santa's List


Good Morning Friends!

I have another simple Christmas card creation to share with you this morning! This BEAUTIFUL Santa from the Santa's List Stamp Set from Stampin' Up! makes some simple, yet STUNNING creations in just a few minutes like this beautiful card!   This Santa makes me SO HAPPY HAPPY!  He's very inexpensive too!  The stamp set is only $12.95!

Measurements:
Base: Crumb Cake Cardstock 8 1/2" x 5 1/2", scored and folded at 4 1/4"
Layer 2: Espresso Cardstock 5 1/8" x 3 7/8"
Layer 3: Crumb cake 5 x 3 3/4", stamped with the sentiment that comes in the set
Layer 4: Cherry Cobbler 3 1/4"  square
Layer 5 & 6: scraps of espresso and Season of Style Designer Series Paper 
cut into banners and stapled to the cherry cobbler layer
Layer 7: That center panel of crumb cake card stock is cut to 3" square.  I stamped Santa in espresso ink and then sponged him around the edges. 
Layer 8:  Two Espresso candy dots from the neutrals collection candy dots!  Such a small detail, but I love what they add to this card! 

That's today's bit of inspiration.  I hope you're inspired to go stamp something beautiful!

Love, 
Selene Kempton

Thursday, August 29, 2013

8/29 Stampin Up! Color Me Christmas and More Merry Messages

Good Afternoon Friends!

Don't cha' just LOVE this cute little reindeer from the Color Me Christmas Stamp Set?? 

Ok, I know I've been showing this one a lot, I just can't get enough of this stamp set!!  So, I have one more sample coming up on my Simply Sunday post.  Make sure you come back and check it out!   It's got presents!!
I'm going to jump right into measurements! 

Base: Crumb Cake 8 1/2 x 5 1/2", scored and folded at 4 1/4"
Layer 2: 5 x 3 3/4" cherry cobbler, embossed with the chevron embossing folder.
Layer 3: 4 1/4 x 1 3/4" Crumb Cake card stock
Layer 4: 4 1/4" x 1 1/2" Season of Style Designer Series Paper 
Layer 5: Early Espresso 2 5/8 x 2 7/8"
Layer 6:Whisper White 2 1/2 x 2 3/4"

He was completely colored with straight markers except for his head, which I used a blender pen to soften him up.  Leaving the middle on the whiter side.

That's my little bit of inspiration for you for today!  Thanks so much for stopping by!

Love, 
Selene Kempton
Tuesday, August 27, 2013

8/27 Color Me Christmas, Oh, Goodie and Season of Style


Good Afternoon Friends! 

When I was a kid, I wasn't big on coloring, but there's something about the little Santa from Color Me Christmas that could keep the 40 year old me happy as a clam for days on end! 

The measurements on this one are easy peasy!  You can make a WHOLE BUNCH using the new season of style Designer Series Paper Packs, because they are sized for making cards quickly!

Here's a peek at the 4 designs that come sized 4 1/2 x 6 1/2", perfect for cutting and layering.

Isn't he dreamy? 

Measurements:
Base: Cherry cobbler card stock, 11 x 4 1/4", scored and folded in half at 5 1/2"
Layer 2: Cherry Cobbler Striped DSP, (from the paper stack) 4 1/4 x 1"
Layer 3: Dot pattern from the same DSP pack, (from the paper stack) 4 1/4 x 3/4"
Layer 4:  Old olive card stock, 3 1/4" x 3" (popped up on dimensionals)
Layer 5: Whisper white card stock 3 x 2 3/4", stamped with the Color Me Christmas and Oh, Goodie Stamp sets!

I straight colored the images with cherry cobbler, blushing bride and basic black markers. Oh and my favorite part!!  Notice the candy dot SELF ADHESIVE buttons and the white button on his hat?  I used glitter on top of the white button, and the great new permanent white chalk marker on top of the candy dots to make the accent on his buttons!  {singing} Awwweeeesome, Right?

To finish it off, I just added a little 2-way glue and dazzling diamonds glitter to the trim of his suit.  Ho ho ho, merry!

Don't forget to order envelopes if you need them!  Ours are better and less expensive!  Just sayin'!

Thanks for popping by today!  I hope you feel inspired to go stamp something fun!

Love, 
Selene Kempton
Monday, August 26, 2013

8/26 Christmas Collectibles and Joy to the World in Midnight Muse, Stampin' Up! #ChristmasCardIdeas

Good Morning Friends!

It's beginning to feel a lot like Christmas with all these Christmas Cards I've been having fun making! 

The season has begun for Christmas Card making and I'm having so much fun doing private classes and helping people figure out teacher gifts, as well as get a jump on their holiday packaging  and card making.  So much Fun! 

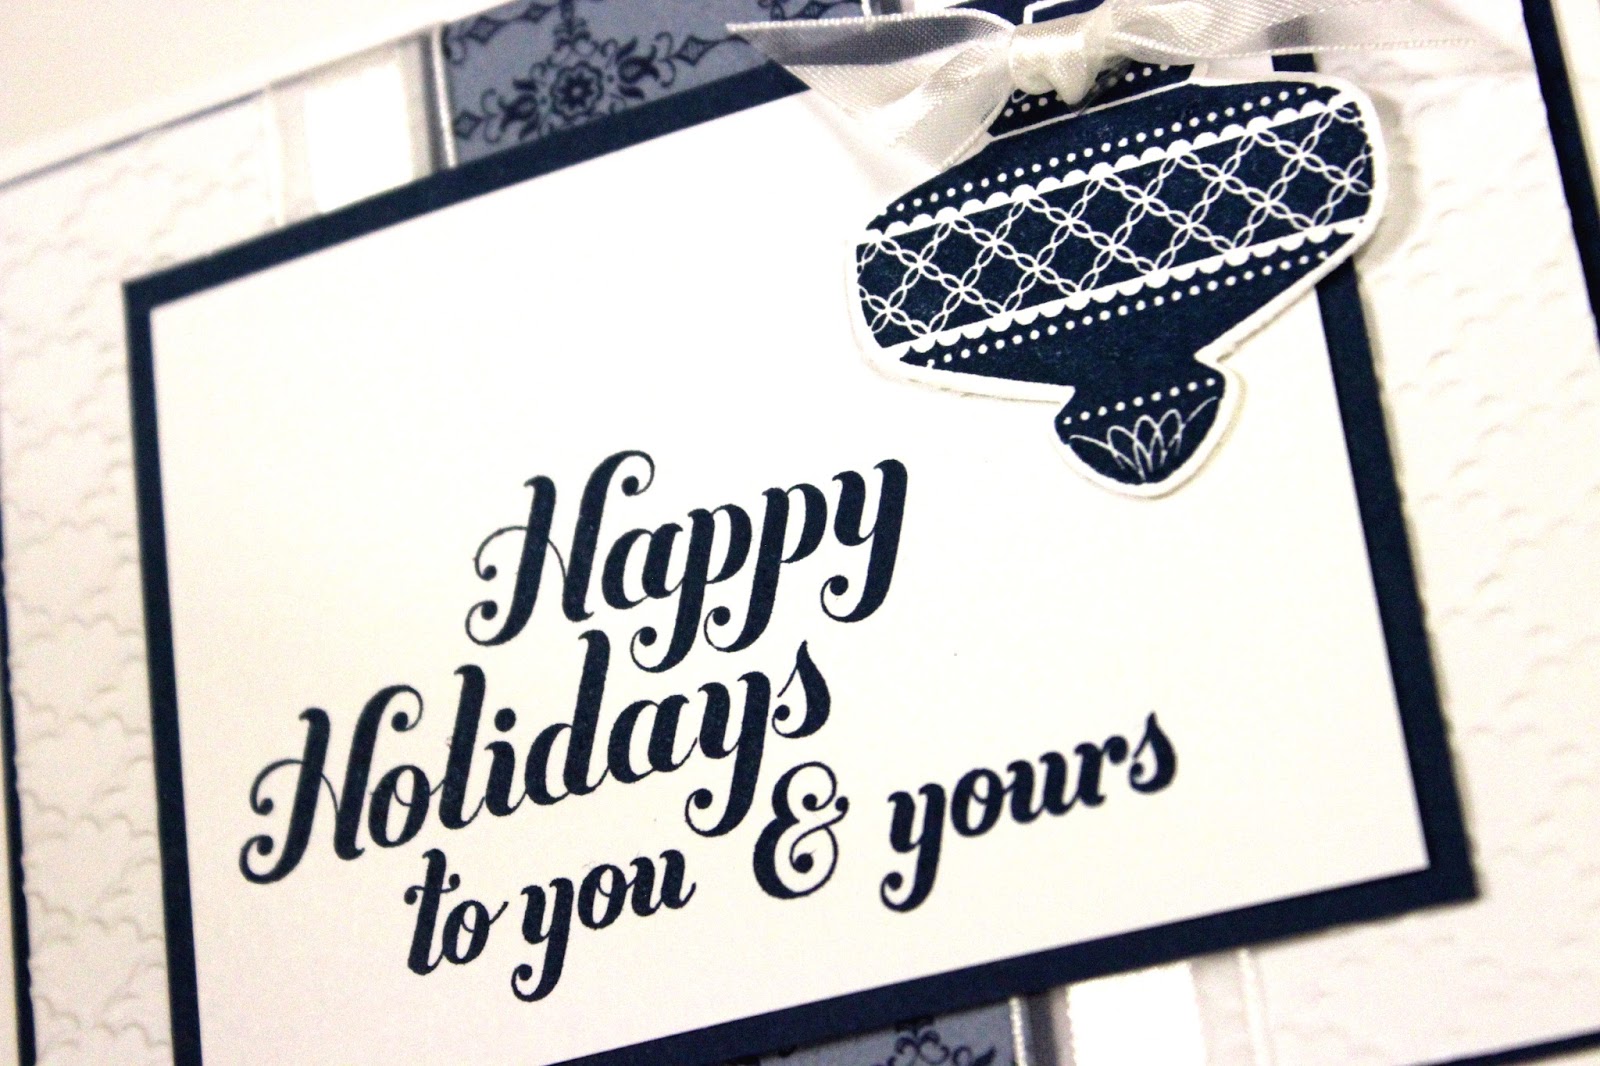
This midnight muse card is a clean and simple stunner!  :)  It was pretty easy to put together, and it uses a few more supplies than yesterday's card, but I think it's worth it!

For starters, the gorgeous font of the Joy to the World Stamp Set!  This stamp set features 4 pretty large, take up lots of space, type of stamp set many of my stampers who don't like to write big long messages inside LOVE! Do you know anyone like that??  :)


Anyway!  This card also uses a REALLY cute new ornament set called Christmas Collectibles!  The clear mount stamp sets are both just $16.95 and the AWESOME new Christmas Ornament Punch is $15.95, but you guessed it!!  There's a bundle for that!  Woot!!


Get the Christmas Collectibles AND the Christmas Ornament Punch as a BUNDLE and save %15.
Here's a link for the clear mount bundle, (just $27.95 for the two items) or if you prefer, here's the wood mount link (at $32.95). 


Okay.. so how about some measurements??
Base: Whisper White Card Stock (CS) 11 x 4 1/4", scored and folded at 5 1/2"
Layer 2: midnight muse CS, 5 1/8 x 3 7/8"
Layer 3: Whisper White CS 5 x 3 3/4"
Layer 4: Midnight Muse 4 1/4" x 3 1/4"
Layer 5: Whisper White Card Stock (CS)4x3 (cut from a 12 x 12 for no waste!
Layer 6: whisper white scrap, stamped with Christmas Collectibles ornament and punched with the Christmas Ornament Punch
Ribbon: I used the GORGEOUS 5/8" organza from Stampin up! ( just 5.95 for 15 yards!)

Thanks so much for stopping by to visit today!  I hope you're leaving with a little inspiration today.


Love, 
Selene Kempton
Sunday, August 25, 2013

8/25 Simple Sunday Christmas Messages, Season of Style, Cherry Cobbler Stitched Edge Grosgrain

Good Afternoon Friends!

Oh what fun indeed!  It's hard to believe we only have 4 months' till Christmas!!  Can you believe the kids will be going back to school (for us it's this week) and the nights are becoming cooler??  Pretty soon it will be apple picking and a few last crisp night campfires.

We are coming into my favorite time of year, fall.

Today, I have a "Simple Sunday" share.  This card only takes a short amount of supplies but packs a WOW!  I sent these as thank you's for orders from my private classes last week, and oh what fun we had!!

So Measurements:
Base: Whisper white 11 x 4 1/4", scored and folded in half at 5 1/2"
Layer 2: Cherry cobbler card stock, 4 1/4" x 3 1/4"
Layer 3: Cherry Cobbler Striped DSP, (from the paper stack) 4 x 3
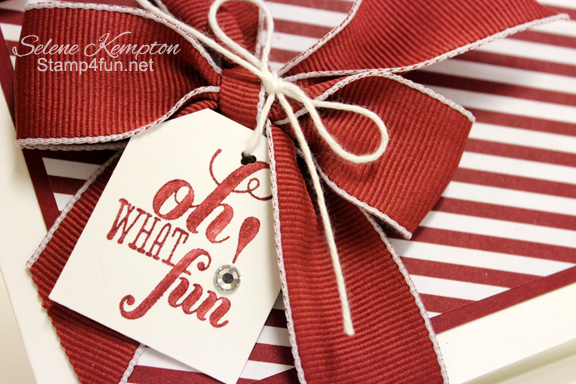
Layer 4: Cherry Cobbler 1" Stitched Edge Grosgrain Ribbon (tied around the inside)
Layer 5: Whisper white scrap, stamped with the Christmas Messages Stamp Set and punched with the large tag punch.
Don't forget to order envelopes if you need them!   Our envelopes are not only stampable, they are less expensive than the office supply stores I've shopped at! 

I used a small hole punch at the top and tied it around the cherry cobbler bow, then took a glue dot to attach it down so it wouldn't move when you pick the card up.

So ~ Tying the bow is the magic on this card, and really NO ONE ties a perfect bow one the first shot!  First I made sure that everything looked flat, then proceeded to "tie my shoes"  It doesn't matter if you do "loop, swoop, and pull" or "bunny ears"  the magic happens AFTER that.  You take your time.  Put your fingers inside the loops to shape as you pull, then pull the ends and mess with it until it's right.  This is really a quickie card!  Finally, I finished it off with a large Rhinestone from the inexpensive pack of rhinestones from stampin up  you get 150 rhinestones, in 3 sizes, plus 3 strips for $4.95!  Love em!! 

So, let's talk about the DSP stacks!  They are AMAZING!  You get 2 doublesided designs, 24 of each.  So if I were to cut only the striped paper for this card, I'd have enough for 48 cards, and a whole extra design to play with still it's a steal at $6.95!

Here's a peek at those 4 designs:
Thanks so much for stopping by to visit today!  I hope I inspired you to stamp a little something simple today!

Love, 
Selene Kempton
Friday, August 16, 2013

8/16 Simply Grateful ~ Magnificent Maple & Harvest of Thanks

Well, hello there friends!

I know I've been a bit off the grid when it comes to blogging.  It's been a crazy, awesome, amazing, stamping filled 2 months!  I have accepted a position with Ronda Wade and the creating success training team and I've been a busy little bee with another extension of my stampin up business.  I am so happy to be working with Ronda.  She has become a very good friend in the process.  I certainly have been doing my share of stamping and then some.  I just let my blog lapse.  I promise to be more consistent with my posts.  My goal here is to give a little snippit of inspiration every day.  I hope you're willing to take the ride with me.

On a personal note, I turned 40 in July and decided that it's time to take care of me.  This is my first week.  I've been to the gym every single day this week (5 days) and plan to continue that as well!  If you want to catch up and see some of what I've been up to, please check out my business facebook page.  It's so quick to just upload a photo instead of sitting down to write.  But honestly, I miss you! 

I'm going to start off simple.  Clean and simple that is!  This super easy card came together in a few minutes this morning.  I cut out the gratitude with my framelits and the leaf with my paper snips.  :)  They ended up being leftover from a project I'm working on for my classes next week. 

When I layered the "gratitude" on top of the leaf.. well, I like it!

Base layer is cut to: 11 x 4 1/4" and is scored in half at 5 1/2"
Layer 2: 5 1/8 x 3 7/8"
Layer 3: 5 x 3 3/4"

Tie on some gorgeous organza ribbon, up in a bow and you're almost there.  I just glue dotted the top pieces on.  So simple, but simple done well is just fabulous.

Stamps: 
131739 (clear) Harvest of Thanks and
131868 (wood only) Magnificent Maple

Ink:
126953 Old Olive Ink Pad
126950 Rich Razzleberry ink Pad

Paper:
100730 Whisper white
115316 Rich Razzleberry

Accessories:
114319 Whisper White Organza Ribbon, 103579 Paper Snips,  129267 Bitty Banners Framelits,


Love, 
Selene Kempton


Friday, April 5, 2013

4/5 Free Shipping for orders April 6-8. Fun with Photowhat?? Photopolymer!! Designer Typeset Photopolymer Stamp Set, Clean and Simple

Good Evening Friends!

I was excited to see another new product released from Stampin' Up! Photopolymer Stamps!  What does that mean exactly?  Well, I take it to mean I can see straight through to my paper and actually SEE where I'm stamping.

Curious..., I ordered the stamp set the same day.  It came in... and sat... and sat.. until tonight!  I realize that this isn't the most beautiful card I've ever made, but I was just playin!  I wanted to see what I would think of the stamps and they are cool. I'd be interested in more designs I think.  At $13.95 for a set of 57, there's value in the price I think we can all appreciate!


Use this exclusive photopolymer alphabet set (with extras!) for titles or embellishments on scrapbook pages, cards, or any type of project. We recommend clear block sizes A, B, G, F, and I (not included in the set).
Our photopolymer stamps offer a versatile all-clear stamping option. You’ll find that our photopolymer is top-quality and give a perfectly stamped image every time. The stamps stick amazingly well to our clear blocks and are easy to place just where you want them. And best of all, you get to enjoy tons of images for a great price!

So, I inked up the big banner first using espresso ink.
Next, I added the word "thanks" on top of the banner on my cardstock, then just placed the clear block on top so when I stamp my letters I didn't have to do them one at a time.  That's pretty clever!

Then, I took out 3 markers and colored the letters individually.  That's how I would use my current stamps, so I wanted to see how it would look. 


Perfect shot, and no stamp-a-majig!  Woot woot! 

To make the ribbon all scrunched, I snipped off the end, and grabbed the white stitching in the middle and pulled it a bit. Then I used tombo multipurpose adhesive to stick the ribbon to the card front.  Here's another peek. :)

The presents come from the Patterned Party Stamp set.  I love these colors together, pacific point, real red and rich razzleberry!  Speaking of... Stampin up announced to demonstrators yesterday, that there is going to be a color update!  I LOVE that I work for a company that is up with the times.  Here's how it's shaking out.

Is your favorite color on the retiring list?  Please don't forget to purchase reinkers for your favorite color ink pads before they are GONE...  I'm so excited Bermuda Bay is coming back, and Wisteria should SURELY be a permanent color, wouldn't you say? 

Oh, so there's even MORE news.  Stampin' Up!'s supplier of watercolor wonder crayons is no longer able to manufacture our line.  The good news is some of the colors are still available.  Head on over to my online store and snag yours up before they are gone.  

That isn't even the best NEWS EVER!!
How about Free shipping for orders placed over the weekend April 6th-8th!  I'm so EXCITED!!!!  You can have ANYTHING shipped, no minimum order for FREE this weekend!!  Want to get mystery hostess benefits?  Go to my store, and enter hostess code: 3BUZX94N
in the bottom left hand side of your shopping cart.  You will see my name pop up as the hostess, but that's okay.  Place a $25 to be entered and for every $25 order you will get additional entries.  Woot!!


 So that's it for tonight!  Thanks so much for stopping by!  Whew! what an exciting weekend!
Love,
Selene Kempton
Stampin' Up! Creative Coach

Click here to order Stampin' Up! products 24/7
Tuesday, March 5, 2013

3/5 New Color Challenge! Sahara, Suede, Primrose Love & Sympathy Clean and Simple Card

Good Morning Friends!

Today's card is VERY clean and simple.  I made it for a stamp a stack that is being held here in the studio this week.  I love this color combination so much I'm going to do another color challenge!  If you'd like to play along, just make a card and link it below! 

The colors are not perfect in the photo here.  This color combination is STUNNING in real life.  I mean, you SERIOUSLY need to try this one on for size!

The colors are Sahara Sand, Soft Suede and Primrose Petals (with a side of vanilla).  It's yummy scrumptious, I promise!

The base layer is 4 1/4" x 11", sahara sand and it is scored at 5 1/2" and embossed with the  Lacy Brocade embossing folder  This color combination is simply AMAZING in real life.  It's most certainly my favorite card in the set (although I really do like them all).  

The primrose layer measures 3 1/2" x 2 1/2" and the vanilla top piece is 3 3/8" x 2 3/8" (or 1/8 inch smaller on both sides).  

I had every intention of using lovely as a tree, and when I started playing, this color combination just came to me.  I think this stamp set Love and Sympathy is not only stunning, it's inexpensive too at $11.95 for clear mount.
So, for the stamping, it was so EASY!  I inked the main flower image up with Sahara Sand and Primrose Petals markers, then added the sentiment on top with Soft Suede and Primrose markers.  I also stamped the sentiment inside to finish off the card, and used the leftover ink to add a "stamped off" floral image to the inside as well. 

I know I say this a lot, but layering your ink can be just as dramatic as adding a layer of paper, when it's done in the right place.  Swoon!  


It might be difficult to see, but I added some dazzling diamonds glitter on top of the flower using a 2-way glue pen.  The finishing touch is a scrap piece of the Primrose Petals 3/8" stitched satin ribbon.  

Thanks so much for stopping by today and letting me share my artwork with you!  Now it's your turn.  I'd love for you to play along and share your artwork here!   Just link up in the next week or so
Love,

Selene
My Stampin' Up! Store
Monday, March 4, 2013

3/4 Pursuit of Happiness, Up, Up & Away, Sycamore street Designer Paper

Good Morning Friends! 

In this busy life we lead, there is ALWAYS a need for a quick and simple card, wouldn't you say? 

The style of this card is CAS or Clean and Simple!  This card is fun, light and airy and will hopefully take you up and away when thinking about your own crafting projects!  :) The measurements are quite simple on this layout.
I started with a 8 1/2" x 5 1/2" whisper white piece of card stock (scored and folded in half at 4 1/4"), and layered some Sycamore Street Designer Paper on top.  The zig zag pattern is cut 5 1/2" x 1", and the polka dots are 5 1/2" x 1 3/4".  Layer them on your card stock and you're ready for a focal point. 

I stamped my image in daffodil colored ink and added the balloon base in rich razzleberry to match the cool designer paper.  I took a marker in the same color and extended the lines by hand. 

Before I stuck the focal point to the card, I inked up the little bird image that comes with Up, Up and Away stamp set.  I stamped it a few times in my panel, and then thought that the birds should really be flying where ever they want to and stamped them outside the boxed frame of my focal point.  {smiles}.

Next, I tied a piece of daffodil seam binding around the card and into a bow.  This ribbon was meant to make it easy to tie bows, I swear!!  It looks so nice when you just "tie your shoes and fluff". 

Here is another close up of my bow, and the pretty birds that are flying wherever they wanted to be.  I also sponged some daffodil ink around my whisper white focal layer to soften it up a little.  I could have used blue, but wanted to stick with the color scheme.  The razzleberry and daffodil really make me smile and remind me of a ray of sunshine.  The quoted stamp comes from Stampin' Up's Pursuit of Happiness Stamp Set. Just like the fabulous quote from Emerson.  "Live in the sunshine" my friends!
Love,

Selene
My Stampin' Up! Store
Wednesday, February 13, 2013

2/13 Stampin' Up! Soda Pop Tops and A Little Bit of Spring CAS Baby Card

Good Morning Friends! 
Before I get started, I just want to do a hoot hoot and a shout out to Jeannette Gauthier who left me the most wonderful comment yesterday ~ you really made my day better Jeannette!  I followed the link to her blog here.  She's got some really cute projects there!  Thanks Jeannette for your kind words!  :) 

Today, I'm sharing another card that I'm going to make with my SANS Valentine's class attendee's tomorrow night.  It's really adorable and easy to reproduce.  I have some folks who have never stamped with me coming and I want to make sure that:
  1. They LOVE stamping!!
  2. They know that they can reproduce it if they wanted to make their own samples, ey?
So, I have employed the KISS method.  = Keep it simple, stamper!  What were you thinking??  :)

The base layer is Marina Mist  8 1/2" x 5 1/2", scored and folded in half at 4 1/4"
Layer 2 (inside and out): whisper white 4 x 5 1/4", and embossed with the polka dot embossing folder
Layer 3: 5" piece of Marina Mist Striped Organdy Ribbon
Layer 4: Soda Pop Tops, squished in the big shot (I'll write more about that down below).
Layer 5: 1/2" punched circles, from the A little bit of spring stamp set
Layer 5a: That's the sweetest punch from Sale-A-Bration called the petite curly label punch (item number 129405 is FREE with any $50 purchase in my online store).  The punched image "cute as a bug" measures 3/4' square.  Wicked cute and wicked simple!  :) 
 So, let's talk about the Soda Pop Tops for a moment.   In the package, you get two sizes. The large one fits the 1" circle punch and the small one is 1/2" an inch. 

To smash them down make them decorative, I ran them through the big shot with no tabs.  When you run them through you still need cutting pads so I used an old one that I snapped in half due to use.  :)  Take the oldest looking one you have and put the sharper edge (in the picture above the sharp edge is up facing you) down against the old cutting plate.  then you're ready to roll so to speak.  :)

I couldn't help myself and ran one two more times and made one completely flat by re-running on tab 1, then tab 2.  They look like little wheels all flattened.  I'm going to have to make something with them.  (smiles).

So here is a close up of the "smashed" soda pop top bottle caps.  They are designed for crafters and at $3.95 for 16, they are inexpensive and fun to work with.  I'm in!  :)
 
Can I just say that it makes me so happy to use a set that's intended for a holiday like Easter and make a non-Easter card!  (breakin the law)  :)  This A little bit of spring stamp set is so useful for so many different things and for demonstrators, I just love the "bug me anytime" sentiment!  I'll be playing with this one for sure in the weeks to come!  

Thanks so much for stopping by today! 

Love,
Selene
My Stampin' Up! Store