Some Guest Artist I am!!
This morning when I realized that I had completely dropped the ball for the cards and things challenge I sprung out of bed (grabbed the nearest coffee) and instantly went out to my craft room.. I have to go to the other side of the garage to turn on the lights to the room.. I remembered that the challenge was red, wasabi and crumb cake... I looked out the window, and look what I saw! Gasp!! The first signs of fall..
Instantly, I thought "where did the summer go." My little one will only be five years old once, and I feel like I worked a little too much this summer. :( The changing of the leaves also signifies the season change and although I'm not a big fan of winter, I feel the change coming.
Many people make resolutions at new years, but I think it's time for me to make one to search for a better balance. To take a tiny amount of time for myself in the big hurricane that life seems to throw at all of us! I have a crazy week and a bunch of busy stampers coming at 6pm. Speaking of hurricanes, it looks like one hit my stamp room so I better move on! :)
In the middle of all of that, here is my clean and simple santa card using all of those thought and feeling and elements. I'm looking to simplify life, and it's funny how what I'm feeling comes out in my artwork... I LOVE how the eyelet border punch is sitting on top of that gorgeous satin ribbon! It shines through perfectly!!!
There's a few things about this card that you may not see in the first photo, so I have a few smaller shots here... First... Santa is sparkly! Now, he is not as sparkly in real life as I'm showing here, but this is the pearlized smooch top coat. His belt is sporting the silver version of the same thing...
Since I brought in a silver accent and always have to coordinate. :) I also added a silver accent to my bow. First, I slid my silver cord (which is on the SU clearance rack for $2.99 today) under the red strip of ribbon I had going across.
Instead of tying a bow, I just flopped the ribbon over onto itself to make a "faux bow". Then I slipped a button over the silver stretchy cord. I slipped my faux bow through the hole behind the button, then tied it. So simple, and so pretty!
I really love this effect. I have several club members after seeing this technique that say they will NEVER tie another bow! :) It does make a very pretty presentation. Well, Santa is done, and I have packets to stuff and a stamp room to clean (for starters). I hope you're all having a wonderful week. I'll try to keep it together when I send my sweet girl off to kindergarten next Tuesday... Mom needs a pedicure really bad, so perhaps that'll be the day!
Tuesday, August 31, 2010
Monday, August 30, 2010
Mojo Monday Baby
Good Morning Friends!
When I saw this mornings sketch from mojo monday, I was thinking of my girlfriend. She just found out that she's pregnant and she's been feeling quite ill. It's a secret still and no one is supposed to know she's pregnant, but I really want to drop her a quick card and let her know I'm thinking about her.
There's quite a few layers this week. :D I think it's a cute card and will mail it off later today.
I hope you all have a wonderful week!
Selene~
Labels:
mojo monday
Friday, August 27, 2010
Saturday Sketch Challenge 166
Good Evening Stampers!
I'm so happy with this week's sketch on Stamping 411! I used the sketch to create a card for my newest downline Michelle, who had her first Stampin' Up! workshop this past Tuesday.
I just wanted to welcome her to the the team and let her know that I was thinking about her.
I started with the neutrals designer series paper, and took the polka dot pattern in craft. I cut an oval from my big shot and used the lattice embossing folder, knowing that I wanted to use an apple pie image for my welcome card. I used the "VERY FUN TO WORK WITH" new seam binding that is in the holiday mini. I added some sticky strip to my card and just worked the ribbon on. I used the largest scallop circle punch on either side of my oval, and my scallop edge punch for the layer beneath that.
Then I went a little crazy with the self adhesive pearls, but why not!?! :D
This Clean and simple card was a blast to make and I hope Michelle loves it!
If you have time this week, please play along with me and the other operators from stamping 411.. There are sketch challenges, and color challenges... weekly how to's and more! I hope you have time to visit!
Thursday, August 26, 2010
Masculine Birthday
Good Morning Friends!
Here's another great, but simple birthday card for you! Have you checked out Stampin' Up's new card kits? They are fantastic. This happy birthday stamp comes from one of those kits. I took the design and kept it simple.
I'll be doing this at a workshop in a few weeks. A pretty cool and simple masculine birthday card! I used the new punch from the holiday mini twice.
I used the lattice embossing folder with the big shot on this. For the matte, I cut the second punch in half and moved it out to make the darker matte. Really simple, very masculine!
Happy Thursday!
Selene Kempton
Wednesday, August 25, 2010
Simple and Elegant Birthday Card
Hey There Friends!
Today's card share is a simple yet elegant birthday card. This is for a new style workshop I've been offering. Guests will be able to make this into a thank you or any greeting that's on the table and they make 3 of the same design.
Very simple, but very pretty.. It's a monochromatic design, meaning it only uses one primary color. In this case, the marina mist color and off white.
If you have some time today, there's a very special guest blogger over on stamping 411. I hope you have a chance to go check out her work. It's very awesome!
Happy Wednesday!
Selene Kempton
Labels:
Birthday Cards
Tuesday, August 24, 2010
Another Card For my sweet girl
Good Morning Friends!
I'm very excited to be a guest on the Cards and Things blog this month. This week is a sketch challenge! I just love sketch challenges, but you knew that! :D
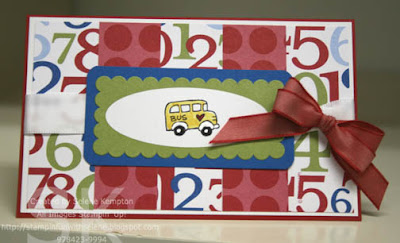
I'm still with this cute little bus image, and when I saw the sketch, I thought of using this adorable paper and the adhesive backed elements to match from stampin up! Simple to the core, I figure I'll be able to slip this into my little one's lunch so she knows I'm thinking of her while at kindergarten (in just two weeks). I made the real red double taffeta bow with Lee Conrey's fantastic bow maker.
Rubbah hugs and Happy Tuesday!
Monday, August 23, 2010
Mojo Funness....:)
Good Morning Friends!...
It's only a few weeks before back to school and I always like to put little notes and treats in my daughter's backpack.. This morning I used the mojo monday sketch, and the theme for back to school to create my card.
In my head, I was thinking "the wheels on the bus go round and round".... but I think they look more like records than wheels... LOL That's okay.. My 5 year old has a big ol imagination, and I KNOW she'll appreciate this card. :D
I'm off to help my mom clean up after her move.. I hope you have a wonderful day!
Friday, August 20, 2010
Saturday Sketch Challenge 165 ~ Vintage Birthday
Good Evening Friends!
I'm very excited to bring you another sketch from the stamping411 Operators! When I looked at today's sketch I thought "vintage" and this style is not my forte, but that's not going to stop me from trying it out! Please let me know what you think...
This card is for one of my BFF's Barbi. I'm a card slacker lately and didn't get a card in the mail for her birthday (which was Tuesday). So I wanted to make this card a little extra special.
I started with the Medallion stamp, to get the circle element on my card front and then ran that layer through my big shot using the Vintage Wallpaper embossing folder. Next, I took a piece of sticky strip and ran it behind the piece so that it went around to the other side....
(((shhhh!! here's a sneak peek from the new holiday mini coming)))) Next, I took the new cherry cobbler seam binding and scrunched it up as I went across my card and ran it around the back of the crumb cake layer. This is really fun stuff to work with!!!! It's a thinner material than ribbon and is fun to mold and shape the way you want it with your fingers! Ahhhh.... Next, I stamped my sentiment on the large white piece (sorry I forgot your birthday Barbi, but I was thinking about you all week). Then crumpled it up in a ball and straightened it out 3 times. I pulled some of the layers of the white paper off and separated it, making this layer very thin.. (I did the same thing with the leaves layer to make them more like real leaves.
Next I stamped happy birthday and punched it with the decorative border and matted it with another punch to make it pop.. I added more ink to give it a more aged look...
Then ~ (now this part almost never happens) I went to the post office and mailed it!!! So, it's already in route.. I'll get better with that I hope! :)
Come play along with the operators and wow us with your talent. Sketch challenges are a beautiful thing and we'd love to see what you've got up your sleeve with this great sketch!
I have a date with my sweetheart tonight, so I'll see you tomorrow! Have a fab weekend!
Selene Kempton
Wednesday, August 18, 2010
How to use the new punches from stampin up.
Good Morning Stampers!
This morning I'd like to share a video from Bonnie Thurber about our new punch designs! I really like the new double punch and now I need to get one for sure!
I hope you enjoy this one as much as I did!
This morning I'd like to share a video from Bonnie Thurber about our new punch designs! I really like the new double punch and now I need to get one for sure!
I hope you enjoy this one as much as I did!
Tuesday, August 17, 2010
Cards And Things Challenge ~ A Sketch!
Good Morning Friends!
I'm so VERY excited about this sketch challenge from my GF Krista today over on the cards and things challenge blog... I'm the guest designer this month, and that job is really easy with such a great sketch artist at the helm.
I can see this as a sketch I'll return to over and over again. Clean simple, and gorgeous... this went together in a matter of minutes.
This card is for a really wonderful long distance friend that I'm so grateful for... Of course I have lots of long distance friends. This one happens to be in my down line and she's been going through some stuff.. I hope this brightens her day.
Well I'm sure you're wondering what that paper is from... Well, it's a sneak peek from the new holiday mini catalog!! Isn't it gorgeous? Well, it's textured and feels like heavy duty card stock, it's not your standard designer paper.
The "Grateful" stamp is stamped in pear pizazz, on so saffron paper, then sponged all the way around with pear again.
I popped that entire 2 1/2" layer up on dimensionals and added a double bow with glue dots. I stamped the "for you" from the same stamp set... it was a long phrase, that I just omitted and used the "for you" by inking with markers. Then I punched the mini tag and attached it with a glue dot..
Easy peasy, rice and cheesy! :) (boy, I'm in a good mood!)....
I decorated the inside by adding an eyelet border punch across the top. I hope you're having a wonderful week!
Selene Kempton~
Monday, August 16, 2010
Mojo Morning Stretch
Well.... I'm not sure if I like the card I made this week, but isn't that the way?
I pulled out the lap of luxury paper, and it looked more "blush blossom" to me, so I pulled out the "hoarded stash" :)
I really do like the double bow, I created with Lee Conrey's bowmaker... Everyone I know who's seen one has to have one, and making the double bow is as easy as making one bow, you just wrap your piece of ribbon around twice! :)
So the colors here are rose red, basic grey, blush blossom and white. I used a two way glue pen and dazzling diamonds glitter. I used some self adhesive jewels for the middle of the dress...
This set will no longer be available at the end of this month. Glad I got my copy!
Have a great Monday!
Selene
Labels:
mojo monday
Friday, August 13, 2010
Saturday Sketch Challenge 164
Happy Weekend Everyone! TGIF!
I'm very excited to bring you another sketch for stamping 411. If you're a new stamper or a seasoned professional, sketch challenges are a great jumping off point when you're trying to design a card.
What a challenge does for me is, it takes one of the "decisions" out of the your card making process. :) When you do a color challenge... Same thing! You look at the colors and see what you have that will fit what you've done.
So moving on to my card for this week. This stamp set, Just Believe, from Stampin' Up! is one of my favorite new sets. I love the floral images and how there is a birthday, thank you, and inspirational saying... In addition there are a few floral images that I think are super versatile.
I chose to use Whisper white, Old Olive and Concord Crush. All the images are inked up with markers.
So here are my measurements... A little more detailed than normal, but that's a good thing, right?
Base layer: 11 x 4 1/4" scored and folded in half at 5 1/2"
Layer 2: 4 1/8" x 5 3/8 (this is 1/8" smaller than the base layer and 1/8" larger than layer 3 ~ which is two lines on your paper cutter if you have 16 lines between the one inch marker)
Layer 3: 4 x 5 1/4" Layer 4: 3 3/4" square
Layer 4A: (i used the ribbon border punch to make the scallops, then attached it to the back of layer 4.. the strip was 3 3/4" long so it matched up perfectly.
Layer 5: (level 1 hostess set in color paper pack) cut to 3 5/8" (which is 1/8" smaller than layer 4.
All the layers above that were stamped on scraps and either cut or punched with punches. :)
I'm off to camp for the weekend! and I'm so excited! I hope you have time to play along with the stamping 411 operators and try a sketch this week! It's so much fun! I always try and see what everyone is doing and leave feedback, so join us wont you? :D
Rubbah hugs,
Selene Kempton
Tuesday, August 10, 2010
Friday Night Summer Oasis Class
What a wonderful way to wave goodbye to the summer mini! This bright and colorful designer paper makes an amazing set of note cards that would be perfect for a gift for anyone!
Date: Friday, August 27th
Time: 6:30PM
Cost: $25
Location: Selene's Stampin Pad
Please email me to sign up for this class: e.selene@verizon.net
Are you a stampin up demonstrator who would like to offer this class to your customers? Just email me for more details
Date: Friday, August 27th
Time: 6:30PM
Cost: $25
Location: Selene's Stampin Pad
Please email me to sign up for this class: e.selene@verizon.net
Are you a stampin up demonstrator who would like to offer this class to your customers? Just email me for more details
Scrapbooking Class Deadline Approaching!
Hey Everybody!
I thought some of you might like a reminder that the deadline to sign up for the tropical/beach themed scrapbook class is this Friday (the 13th). Please let me know if you are going to join us!
There are two sessions for this class. For the "route 2" crew, the class will be at Jenn B's house on Thursday the 19th starting at 6 PM. There is another session on Saturday the 21st at 10AM here at the stamping pad.
At this class you will make 8 summer themed pages. Four pages will be more tropical and the other four will have softer beach colors. The class should take about 3-4 hours to complete and you will leave with EIGHT awesome pages ready for your photos!
The class is $50 (prepaid by this Friday ~the 13th~so I can order supplies), which works out to $6.25 a page! Please bring your own adhesive (and a refill to be safe). Please do not delay, this class is full at 8 people per session.
Below is one of the two page spreads we will be making! (Click the photo below for a closer look).
Have a wonderful day!
Rubbah hugs,
Selene~
Labels:
scrapbook samples
Cards And Things Challenge
My friend Krista over at Cards & Things asked me to be the guest designer for August. This week's challenge is a color challenge. Night of Navy, Baja Breeze and Basic Grey are the colors.
One of my BFF's lost her sister this week and I really wanted to make a card for her to show support. I think that this color scheme really lends itself to a sympathy card, and here's the one for miss Diane.
Please pop over to the cards and things blog and let them know I sent you!
Have a great day!
Rubbah hugs,
Selene
Monday, August 9, 2010
Super Quick Mojo
I'm headed out the door this morning to the museum with my daughter and her friend from school last year. A surprise play date with her friend Gabe! She's going to be so excited! :)
I was making cards yesterday, and still had the just believe stamp set on the table along with the designer paper from the level one hostess paper pack (in color). The colors of my card are old olive and concord crush. I used shimmer white to stamp the main panel for the flowers.
I inked the images with markers... This went together very quickly! Just what I needed this morning!
Have a wonderful day!
Rubbah hugs,
Selene Kempton
A card by Michelle and I
A new stamping friend Michelle was here in the studio Saturday morning, and together, we made this gorgeous card. She asked me... What's watercolor paper??? and this is what happened! :)
I started with stazon black ink, and my new BFF, the Growing Green stamp set. That's the pretty flower in the middle. We used a marker, and watercolored the center with cherry cobbler. Next, I grabbed a black marker and the sentient from another wonderful set, Cottage Garden! Oh it's so pretty! So we matted it.. in my excitement, I cut the layer a little too wide, then decided to keep it! I like it! We embossed the front with the elegant Bouquet Embossing folder.
Next ~ I asked her what color SHE thought would go with what we'd already done, and she picked the blushing bride color.. I think they are stellar together! We made a quick bow, and used snail adhesive to stick that over the layers and assembled the card!
Oh and let's not forget the finishing touches. We used the tip of a pair of snips to add the teeny self adhesive flat pearls that are now available through stampin up. They are called "jewels" and are only $4.95 for a package of 150 self adhesive pearls or rhinestones, plus you get 3 "strips" in addition to the 150. I imagine that I'll be using these alot because they are easy to use and cost effective! :) ((love that!))
119246 Jewels ~ Basic Rhinestone
119247 Jewels ~ Basic Pearls
in case you need the item numbers.. If you'd like to place a stampin up order through me, click here then click shop now. Have a great week!
Rubbah hugs,
Selene Kempton
Friday, August 6, 2010
Hey Everybody!
It's time for another simple sketch challenge from the stamping 411 operators.
I really thought when embrace life retired, that I would never find a set that I liked to do the "reinker float" with as much. I vowed to hold on to that set forever, because I'd never get "there" again... Also... I thought that my razzleberry and bordering blue were the bees knees...
When I started playing with baja again, I thought of bordering blue... although I think it's looking almost tropical blue here..
Ahhhhh my reinker float! :) Actually, the technique originated with Crystal French, and you can see all about her beautiful creations here. For a tutorial on how I do the "reinker float" click here.
So ~ Here are some measurements for you.
Base: Whisper white 11 x 4 1/4", scored and folded at 5 1/2"
2nd layer: Baja 5 3/8 x 4 1/8"
3rd layer: Whisper white 5 1/4 x 4"
4th layer: Baja 3 1/4 x 4 1/4
5th layer: Whisper white 3 1/16 x 4 1/16"
6th layer: Shimmer White, embossed with the reinker spread technique 3x4"
I layered the ribbons for the piece going across the bottom third of my card. Then I punched a flower from the three flower punch in baja. I layered a razzleberry oval on top, and finished it with a NEW oval that will be available in the holiday mini! I added some of our self adhesive bling, using the tips of my snips.
I adhered layer 2 and three together, then ran them through the big shot at the same time. I used tombo adhesive to stick all the layers together, except for the ribbon. For that I used snail.
I hope you all have a wonderful weekend, and maybe check out the cool challenge and post a card if you have time!
Rubbah hugs,
Selene Kempton
Thursday, August 5, 2010
A little something for mom
My mom is most certainly a tea person. I got her a little something for her upcoming move and made this quick and cute card to go with my gift.
The colors are pacific point and daffodil delight. I water colored the teapot with markers and an aqua painter.
I embossed the back panel with the big shot, then heat embossed the sentiment with white embossing powder. I hope you're having a wonderful week!
The colors are pacific point and daffodil delight. I water colored the teapot with markers and an aqua painter.
I embossed the back panel with the big shot, then heat embossed the sentiment with white embossing powder. I hope you're having a wonderful week!
Wednesday, August 4, 2010
Get well wishes
I made this card a few weeks ago when my friend Gina came over for a "mom" play date. :)
The colors were inspired by a bathing suit that my daughter had on that day. Inspiration can come from anywhere! :D
I used markers and aqua painters to watercolor this image that was stamped on whisper white. The colors are pacific point, tempting turquoise and daffodil delight.
I thought that this fantastic color combination would make anyone under the weather feel better! I hope you're having a great day, and if you can, stamp something fun today!
Rubbah hugs,
Selene Kempton
Labels:
Get Well
Tuesday, August 3, 2010
Just Having Some Fun
I was a lucky mommy today. My daughter decided to take a cat nap at 5PM and I had a few minutes to play.
So I took Mary Jo's GORGEOUS sketch from her blog, technostamper.
I was so bummed out when I saw that the color of this paper changed from purple to poppy, and now that I'm playing with this new designer paper in person, I'm in love all over again.
So First, Here's a Supply list of what I used.
Stamps: Cottage Garden Wood/Clear 117068/120003
Ink: 102283 Versamark, 119782 Poppy Parade Classic Ink
Paper: 119831 Sunny Garden Designer Paper, Crumb Cake Card stock, Whisper White Cardstock
Accessories: 119247 Jewels, Basic Pearls, 103579 Paper Snips
I cut a piece of whisper white 2" x 4 1/4" and stamped the sentiment on it. I stamped some random flourish lines (that also came in the set). I cut a 2 x 1 1/2" piece of designer paper and added it to the end of the strip rounding the corners of my top left and bottom right only with my 3/16" corner rounder.
Next, I took the crumb cake base (11 x 4 1/4, and scored and folded in half at 5.5 inches) and used versamark with the flower image from the same set. I embossed the flowers on the background with clear embossing powder.
I went back to the designer paper and cut out 5 flowers and popped them up using dimensionals. I ran a piece of the poppy colored ribbon across my card stock, then attached the focal point to the base using dimensionals.
I finished it all with the self adhesive mini pearls that are in the new catalog. These are by FAR my favorite new toy from the new book. For $5, you get 150 SELF ADHESIVE halfback pearls plus three strips... They are so fun to work with. I've found that picking them up with the end of your snips (scissors) are the easiest way to use them
I hope that you're all having a wonderful week and that you have time to stamp 4 fun today!
Rubbah Hugs,
Selene Kempton
Online Ordering (click shop now)
Cards and Things Challenges
Good Morning Friends!
I was surprised and honored when a stamper I admire, asked me to be the guest designer for her Cards and Things challenges for the month of August. Krista Driessen is one talented lady from the Netherlands. She has a challenge blog called Cards and Things.
I have to admit, when I saw this week's color challenge, I felt REALLY challenged! :) I'm pretty happy with the result of my card. The color challenge is not quite navy, rose red, crumb cake and bashful blue.... All on ONE CARD! Here is what I came up with. I showed the 4 markers together in the picture, because that's how I started in my creative process. I stamped my cupcake on watercolor paper using stazon black, and then began to watercolor, using an aqua painter I layered bashful blue on top of rose red cardstock and ran them both through the big shot at the same time. I find on designs that have a lot of detail, sometimes my cardstock shrinks, then it looks like my cardstock is not cut right. By running both layers at once, you can avoid all of that. :D
So ~ then I pulled out my kraft colored ribbon. I know that it's retired, but I purchased 3 rolls when I knew it was going out. I love the taffeta ribbon in kraft/crumb cake. It's so darn pretty. Finally, I took a 1/2" scrap of vanilla cardstock and stamped my sentiment. I trimmed the edges by hand to make my faux tag and stuck it under the ribbon with some glue dots.
Finally I added some smooch top coat in gold and clear illuminate top coat to add some bling. I'm not sure if the photo does it justice here, but it's a cool accent ink ~ not really meant for coloring images in.. It's only meant to add a dash off color to accentuate the positive. :)
This one is pretty simple, but there were a lot of colors for me, so I kept the layout pretty clean. Let me know what you think and please pop over to the cards and things blog and let them know I sent you!
Monday, August 2, 2010
Looking to secure a space
Hey There Stampers!
I thought I would see if any of my blog readers have ideas for me! I have tried to secure a location for a Breast Cancer Stamping Fundraiser on World Card Making day, October 2nd. I thought that I was all set, and I hit a bump in the road and my location has fallen through.
Do any of my local readers, know anyone at a hotel or professional meeting space that could help me secure a space for that date.
I plan on paying for the room out of pocket, so that we can donate EVERY CENT collected to go to the making strides charity for Breast Cancer. Please email me at e.selene@verizon.net if you can help me! I will share some projects later on. (((rubbah hugs)))
Selene
Sunday, August 1, 2010
Class THIS Friday! Baja Gift Set
Isn't this the cutest gift that you could give to someone?
Bright colors, bold patterns & a vintage texture create an eye-catching combination that is sure to elicit a “wow” from everyone who sees it.
In this class you’ll use the Greenhouse Gala DP, Friends Never Fade stamp set and Vintage Wallpaper textured impressions folder to create these four gorgeous cards along with a coordinating window card box to gift them in.
Date: This Friday August 6th,
Time: 6:30 PM
Cost: $25 (please bring your own adhesive)
Location: Selene's Stampin Pad
Please email me to sign up for this class: e.selene@verizon.net
If you are a demonstrator and would like to offer this class to your customers,
just email me at the above address for more information.
Selene Kempton
Subscribe to:
Posts (Atom)