Hello Friends!
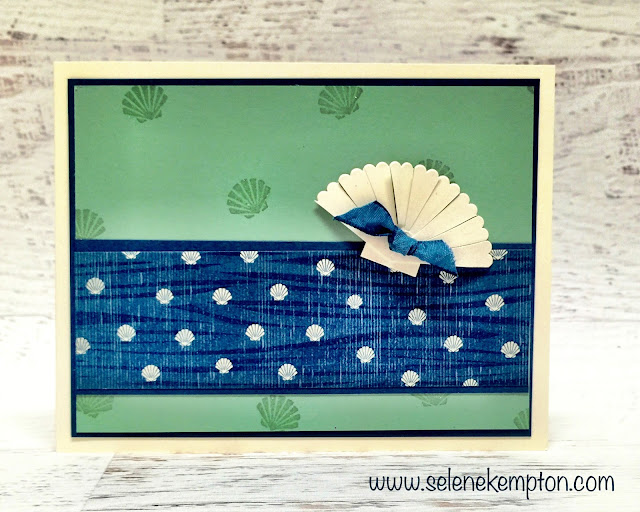
I have a really sweet idea for you today using the Seaside Shore Suite of products. I designed this card as an extra card when playing with my class to go this month.
First, to make the seashell, take a 2" Scallop Circle, cut from the NEW 141705 Layering Circles Framelits. Cut it down so that you have about 40% of the circle, then grab a pair of paper snips and make a cut every second scallop. Cut a small rectangle from the scrap paper and you're ready to go!
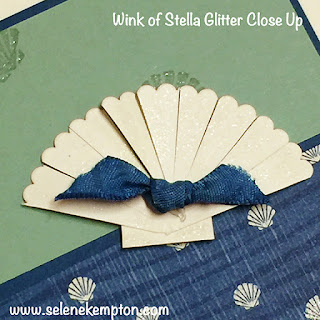
I used a bone folder to shape my seashell so that it would look more realistic, and of course I added some Clear Wink of Stella Glitter to the stamped images and to the top of my "framelit art" seashell. Supplies & the full set of measurements are below.
If you love this card, be sure to check out this month's class to go that uses this amazing suite of products. Click here for more details or to sign up.
Stamps: Seaside Shore 141625 Clear Mount, 141622 Wood Mount
Ink: 138326 Mint Macaron Ink Pad
Paper: Very Vanilla, Dapper Denim, Mint Macaron, By the Shore Designer Series Paper
Accessories: Layering Circles Framelits, Paper Snips, Dapper Denim Rouched Ribbon, Stampin' Sponges, Snail Adhesive, Dimensionals and Glue Dots.
Measurements:
Base: Very Vanilla Card Stock 11 x 4 1/4", scored and folded at 5 1/2"
Layer 2: Dapper Denim Card Stock 5 1/8" x 3 7/8"
Layer 3: Mint Macaron Card Stock 5 x 3 3/4"
Layer 4: Dapper Denim Card Stock 5 x 1 5/8"
Layer 5: By the Shore Designer Series Paper, Seashell Pattern 5 x 1 1/2"
Layer 6: 2" Very Vanilla Card Stock, Die Cut Scalloped Circle
Layer 7: 4" piece of Rouched Ribbon, tied in a knot and trimmed.
Steps:
- Using Mint Macaron Ink, stamp the seashell pattern randomly on the Mint Macaron Card Stock (layer 3).
- Use a Stampin Sponge, to sponge the outside edges of this layer with Mint Macaron Ink.
- Use Snail Adhesive to attach layers 1-5, then set the card aside for a moment.
- Using paper snips, cut the scalloped circle down to about 40%. First, cut it in half, then trim 4 scallops off each side as shown in the photo
- Cut into every second scallop with paper snips to make the shell look separated.
- Using paper snips, freehand cut a small rectangle to go underneath the tip of the seashell. Use a glue dot to attach it to the seashell
- Use a bone folder to shape the seashell, so it looks more realistic.
- Use your clear Wink of Stella brush to add a touch of sheen to the sea shell, and to the sea shells that you stamped on the card.
- Attach the seashell to your card with Dimensionals.
- Add the knot to the middle of the sea shell with a glue dot and you are done. :)


2 comments:
Super cool!
Super cool!
Post a Comment