Good Morning Friends!
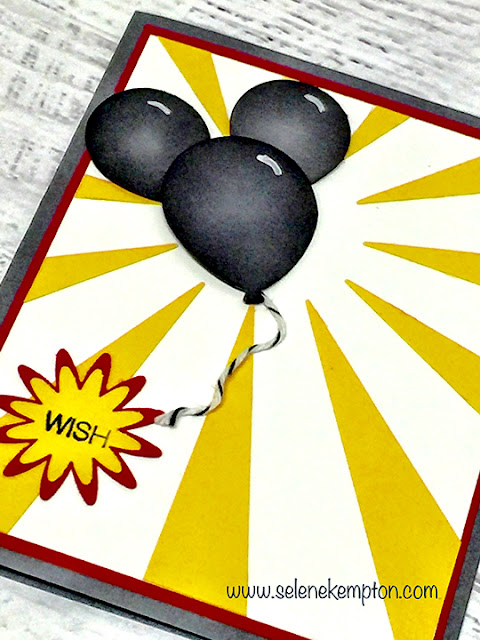
How about another sweet card share? Today's card would be great for any kid at heart! This is the sweetest project ever, and it uses the scraps from the Sunburst Thinlits to make this awesome background! Read on for measurements and step by steps.

Stamps: Holly Jolly Greetings by Stampin Up
Ink: Archival Basic Black ink from Stampin Up
Paper: Basic Grey, Real Red, Whisper White and daffodil Delight
Accessories: 140609 Balloon Punch, Sunburst Framelits, Stampin Sponges, Basic Black Bakers Twine, 140612 Blossom Punch, 132133 white Stampin' Chalk Marker
Measurements:
Base: Basic Grey 8 1/2" x 5 1/2", scored and folded in half at 4 1/4"
Layer 2: Real Red 5 1/8" x 3 7/8"
Layer 3,4 and the inside: 5 x 3 3/4
Steps:
- Use the big shot to cut the Sunburst shapes from the 5 x 3 3/4" layer of Daffodil Delight.
- Lay the die cut on top of the whisper white.
- Use liquid glue to glue down the "scraps" to the Whisper White Card stock, Remove the die cut piece and you can use it on another card.
- Punch out two small balloons and one large ballon from the balloon punch
- Sponge all three balloons with the black archival ink so there's a highlight in the center.
- Use the White Stampin Chalk Marker to add the "c" shapes to the top of the balloons to show a shine on the top right hand side.
- Punch out scraps from the real red card stock and the Daffodil Delight Card stock.
- Stamp the word WISH from the Holly Jolly Greetings Stamp set on the Daffodil Card stock.
- Attach the Whisper white layer to the Real Red, then onto the card base.
- Use two dimensionals to stick the bakers twine to the card front, then add the balloons on top as shown in the photo above. I used dimensions on all the balloon layers.
- Attach the sentiment to the card front and you are done!
Isn't this super sweet? Need any supplies to make this card? Here's a link to my store.
Thanks so much for stopping by today! Wishing you joy!
Love,
Selene


0 comments:
Post a Comment