Showing posts with label Baby Cards. Show all posts
Friday, March 29, 2013

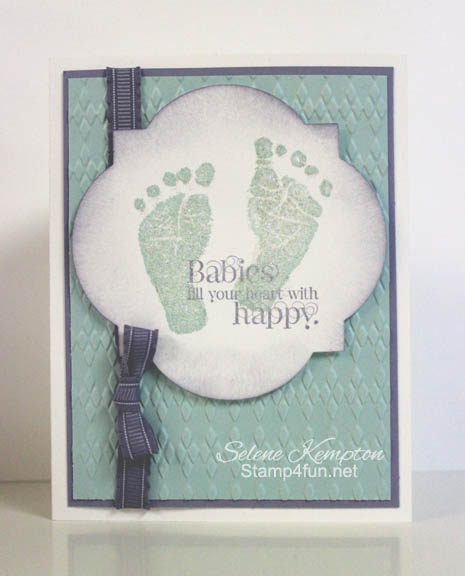
3/29 Baby Prints and Cuddles and Kisses Baby Cards

Good Evening Friends! 

On a personal note, I took mom to the doctor today and she's doing great with healing. 

About 3 more weeks and she gets her cast off, thanks so much for your prayers and well wishes.  She's doing great! 


I created this baby trio of cards for a stamp a stack last month and everyone loved them!  I started with the Baby Prints and Cuddles and Kisses Stamp Sets.  These sets are amazing!!  The Baby Prints is one that will be in my collection LONG after it retires.  It's always so cool to make hand print and feet cards for baby, and they come together so quickly!  Here's a look at the whole stamp set.  Awesome, huh?  This stamp set is SO useful!  I used it also in scrapbook class this month for non-baby pages for the "cherish the moments" stamp.  Isn't that a great phrase for a scrapbook page?  
I'm just TOO excited about these.  The other stamp set Cuddles and Kisses is another STAPLE with hard to find sentiments that I know I'm never going to want to part with. 

Here are the trio of cards we made.  We stamped the images on a precut Window Frames Collection Die Cuts. So simple! so pretty! So there is so saffron, pool party and pink pirouette.  All the cards have wisteria wonder in between the top and base layers.  The white layers were also sponged with wisteria wonder ink.  Aren't they cool? 
 Here's a close up  look at each of the cards. 


Thanks so much for stopping by today!


Love,
Selene Kempton
Stampin' Up! Creative Coach
My Stampin' Up! Store
  
Wednesday, February 13, 2013

2/13 Stampin' Up! Soda Pop Tops and A Little Bit of Spring CAS Baby Card

Good Morning Friends! 
Before I get started, I just want to do a hoot hoot and a shout out to Jeannette Gauthier who left me the most wonderful comment yesterday ~ you really made my day better Jeannette!  I followed the link to her blog here.  She's got some really cute projects there!  Thanks Jeannette for your kind words!  :) 

Today, I'm sharing another card that I'm going to make with my SANS Valentine's class attendee's tomorrow night.  It's really adorable and easy to reproduce.  I have some folks who have never stamped with me coming and I want to make sure that:
  1. They LOVE stamping!!
  2. They know that they can reproduce it if they wanted to make their own samples, ey?
So, I have employed the KISS method.  = Keep it simple, stamper!  What were you thinking??  :)

The base layer is Marina Mist  8 1/2" x 5 1/2", scored and folded in half at 4 1/4"
Layer 2 (inside and out): whisper white 4 x 5 1/4", and embossed with the polka dot embossing folder
Layer 3: 5" piece of Marina Mist Striped Organdy Ribbon
Layer 4: Soda Pop Tops, squished in the big shot (I'll write more about that down below).
Layer 5: 1/2" punched circles, from the A little bit of spring stamp set
Layer 5a: That's the sweetest punch from Sale-A-Bration called the petite curly label punch (item number 129405 is FREE with any $50 purchase in my online store).  The punched image "cute as a bug" measures 3/4' square.  Wicked cute and wicked simple!  :) 
 So, let's talk about the Soda Pop Tops for a moment.   In the package, you get two sizes. The large one fits the 1" circle punch and the small one is 1/2" an inch. 

To smash them down make them decorative, I ran them through the big shot with no tabs.  When you run them through you still need cutting pads so I used an old one that I snapped in half due to use.  :)  Take the oldest looking one you have and put the sharper edge (in the picture above the sharp edge is up facing you) down against the old cutting plate.  then you're ready to roll so to speak.  :)

I couldn't help myself and ran one two more times and made one completely flat by re-running on tab 1, then tab 2.  They look like little wheels all flattened.  I'm going to have to make something with them.  (smiles).

So here is a close up of the "smashed" soda pop top bottle caps.  They are designed for crafters and at $3.95 for 16, they are inexpensive and fun to work with.  I'm in!  :)
 
Can I just say that it makes me so happy to use a set that's intended for a holiday like Easter and make a non-Easter card!  (breakin the law)  :)  This A little bit of spring stamp set is so useful for so many different things and for demonstrators, I just love the "bug me anytime" sentiment!  I'll be playing with this one for sure in the weeks to come!  

Thanks so much for stopping by today! 

Love,
Selene
My Stampin' Up! Store
Saturday, January 14, 2012

My Digital Studio Baby Announcements

Good Morning Friends!

For those of you who know me well, you know that I briefly took a job this year to help pay the tuition for my daughter's school. I was very good at the photography... but let's just say I needed a monkey to come out of my cart and do the sales piece. I could use a sales person behind me on my shoulder. :D All in all, it wasn't the right place for me. I made another difficult decision to leave.

Recently I was asked by a few friends to take some pictures of their new grandchild for them. I got the equipment I needed for my camera from Santa and it seems I'm on my way! It's hard to know what God has in store for me.

The ability to capture one of God's greatest gifts on film couldn't be a better gift to me. I count my blessings every day that God had given me a way to stay at home and take care of my daughter while giving me a way to make a few bucks here and there and help pay for her education. More importantly, I thank God for the friendships that I have built as a result of crafting. A card is a pretty powerful thing, it's the biggest little thing you can do for someone. Anyway, I'm excited to share with you some of the photos I took and two different birth announcement samples. I took all the photos, and used My Digital Studio to create the Birth Announcements.

This first design is a "case" of my favorite birth announcement from my old job. Of course I changed it quite a bit and put the Stampin up spin on it! They will be printed post card style 5 x 7 and will be printed both sides. So, the two pictures shown here, will be one postcard.


The second is an alternate announcement to show a different design. I really like them both and hope that my friend will like one of them. Although she said she wont be needing many. I still had fun playing with the pictures of this new little miracle.

That's it for today. Watch out for those little blessings!
Rubbah hugs,
Selene~

Wednesday, December 21, 2011

Sneak Peek! Baby Prints

Good Afternoon Friends!

I'm so excited to be able to share another card made with new goodies today. This one uses the Baby Prints stamp set, which will be available on January 4th!

I'm in FOUR swaps in the next few weeks and I'm stressing a bit.. I was thinking of doing this for one of them, but I'm still not sure.. Looks like I'll be going back to the drawing board this afternoon.

I always joke with my customers and say "when in doubt, add another layer of paper," Well in some respects layering your ink can do the same thing! I love the sentiment stamp on top of the footprints. Adding layers and colors to your ink can be AS effective as adding another layer of paper! Too fun! This one is a little over the top. I had fun with the new framelets... They allow you to stamp an image and cut it out, the way you would with a punch, but using your big shot! They are super fabulous! I added the little pink button, but it was getting lost on the white, so I put a small heart punch behind it.. I love all the polka dots and layered fun things going on with this card.

Thanks for stopping by today.
Rubbah hugs to you!
Selene Kempton
Thursday, July 21, 2011

Potential Club Card

Outside my comfort zone... That's a great way to describe this card... Yet I sort of like it! This card is using a brand(y) new stamp set I got at convention... and I'm thinking that maybe it should be my club card for next week?

Talk to me... If you were/are a club member, would you like to make this one?

It's funny how my artwork can sometimes mirror what's going on in my personal life.

I had a whirlwind few weeks. Convention was an absolute BALL, and I got to see so many good friends and make some new ones too! While I was there I got a phone call for a potential part time DREAM job. I interviewed this past Monday morning (after taking the red eye home on Sunday), and was offered a position at the interview!

I quickly accepted my new position of Professional Newborn Photographer, at a local hospital near my home. I'm very excited, hoping that it will be enough to help my family and the GREAT news is that I plan to continue my stampin up business as well! In fact, I'm feeling encouraged that with a little less stress about money, I'll be feeling more and more creative and relaxed!

So I got a new job around babies, and I'm feeling very bright.. Guess that explains my card today! I would also like to mention that I found the sketch for this fabulous card over on split coast. What a great sketch!

While we're on the subject of being MORE creative!... Guess what?? My good friend JoAnne, who has been crafting with me for just about five years, FINALLY decided to join Stampin' Up! She joined my AWESOME team of demonstrators yesterday! Check out the cool box that we BOTH receive because she signed up!
JoAnne and I will get a kit each to create this AWESOME project, and it has a $40 value! Isn't that awesome?? We are planning to get together and make our boxes together. If you want to join us, maybe you should check out the starter kit!

It's on sale till the end of the month and it's only $99! Everyone who was here for my monthly team meeting is planning to attend convention with me next year. I came home with 9 free stamp sets.. Everyone who went received 7, then I got two more for awards in sales and recruiting because of all of you (and my fab team). I really feel blessed... and I have a bunch of cool new stuff to play with !!!
If you would like to check out the promotion, just click here to go to my website, or give me a call! I'd love to help you with your $99 kit.

By the way.. Would you like to see what JoAnne is getting? The kit was so awesome by itself that she didn't substitute any of the items out. But you may trade items in the kit for different stamp sets if you prefer. All this plus the FREE project kit = over $200 worth of products... amazing....

$99 Starter Kit + Free Project Kit!

During July, you can join the Stampin' Up! family as a demonstrator for only $99! This limited time Starter Kit—valued at $185—comes with the following high-quality products:

  • Easy Events Clear-Mount Set*
  • Pennant Parade Wood-Mount Set*
  • Basic Black Classic Stampin' Pad
  • Old Olive Classic Stampin' Pad
  • Pumpkin Pie Classic Stampin' Pad
  • Real Red Classic Stampin' Pad
  • Brights 8-1/2" x 11" Assorted Card Stock
  • Just Add Cake Designer Series Paper*
  • Chocolate Chip 1/2" Scallop Dots Ribbon*
  • Note Cards (20)
  • Clear-Mount Block C
  • Blender Pen (1)
  • SNAIL Adhesive
  • Business supplies

*Brand new to the 2011-2012 Idea Book & Catalog!

Much love to you all! Can't wait to get back to stamping!

Selene Kempton

e.selene@verizon.net

Sunday, June 26, 2011

Baby Steps ~ Boy card and SNEAK PEEK

Good Evening Friends!

Tonight I have a quick and cute card share for you. I have been CRAZY busy trying to earn enough for the first tuition payment of the year, and I did pretty good. I came to within $25 of what I need for this coming Friday (the July 1st payment). Thanks to all of you and my local customers who came out for the $2 card event last week and to a few friends who placed orders and/or asked me to make them some cards to participate long distance.

So here I have something old, something new, and of course something blue! On Friday, my friend Michelle, who was the last one here for the $2 card event, asked me about other uses for her sanding blocks. She purchased them last month so that she could condition her stamps, meaning taking the film off the stamps that comes from the manufacturing process. If you've ever had a bold stamp set that doesn't seem to be accepting your ink, you may need to condition your stamps and you can check out the tutorial at the link above.

Anyway, I showed Michelle how after embossing polka dots on designer paper, that a sanding block will make those dots pop! :D So, just run the paper through your big shot with your favorite embossing folder, then gently take a sanding block to the top. Note: if you try this with regular Stampin' Up cardstock, the paper will not show white as the SU! cardstock is dyed all the way through. However, it will appear to be slightly lighter due to distressing that layer or roughing it up! :D

So that piece of designer paper was sitting on the table looking at me in my eye on Friday. :D I did have one hole in the card selection last week, and that was baby boy. I promised my good friend Barbie that I would make her a baby boy card... well here it is! I just ran out of time around the event last week. There were 10 different designs that featured retiring stamp sets, with cool embellishments that may or may not still be current. The cards were gorgeous!

I'll try and share some more this week. This stamp, which is a stamp that is sold by itself is called Babysteps and will no longer be available for purchase after THIS Thursday. Gosh ~ I love how the polkadots in the elephant's ear tie right into the ribbon and sanded embossing. I went through my stamps tonight and there are SO many of my sets retiring, I want to say at least 60 sets this time!

So how about some measurements:
Base: So saffron 8 1/2 x 5 1/2", scored and folded in half at 4 1/4"
Layer 2: 5 1/8" x 3 7/8" (note: this is only 1/8" larger on two sides than layer 3.
Layer 3: 5 x 3 3/4", DSP, embossed and lightly sanded.
Layer 4: Chocolate chip polka dot ribbon.. here is the sneak peek! Isn't that ribbon GORGEOUS??
Layer 5 3 1/8" x 2 1/8" chocolate
Layer 5: 3x2" whisper white, inked and stamped with markers in turquoise, chocolate and real red.

Pretty easy and straight forward... just my speed.

Being the end of the year, I just want to thank those of you who continually do business with me. I know that you have choices of who you do business with. For those of you who made me your "stamp girl," I want you to know that I really appreciate your business. My stamping business is currently my only source of income to help out my family and I feel completely blessed to have made so many life long friends as a result of my little business. If you do not already have a demonstrator and would like to place an order through me, you may do so at my online store anytime.

In addition, I will mail a brand new FREE catalog to anyone who places an order that is $75 (before tax and shipping).


Thanks for visiting today and every day.

Rubbah hugs,
Selene Kempton
Saturday, April 2, 2011

More Baby Steps!!

Good Morning!

I had fun playing with the baby sets stamp set this week, and the sketch over on split coast.. Well, I had enough cut to make 4 cards (for the new rack at the florist shoppe).

So several of you have been emailing me about how all that is going to work. So ~ I'll let you know that I am bringing the rack in.. She will charge $5 for my cards, and I will get $2.50. She also is putting out my invitations and favor samples! :D I have taken all the cards off my rack and made sure that they have the angel stamp on the back. These are located on page 144 of the idea book and catalog.

...and that's about it! Boy, I hope they like my work! :D

Measurements for both (even though they are laid out differently):
Base: 11 x 4 1/4" scored and folded in half at 5 1/2"
Layer 2: Marina Mist Card Stock 5 x 3 3/4"
Layer 3: Whisper White 4 7/8" x 5 5/8"
Layer 4: 3 1/8" x 4 5/8" Melon Mambo Card stock
Layer 5: 3 x 4 1/2 Regal rose DSP
Layer 6: 1 5/8" x 4 1/8" Melon Mambo Card stock
Layer 7: 1 1/2" x 4" Regal Rose DSP
Layer 8: 3 1/8" x 2 1/2" Melon Mambo Cardstock (I used the pinking hearts border punch on this layer)
Layer 9: 3" x 2" Whisper White


I inked the main image with markers... I'm loving these baby cards!

Off to stamp some more! Have a WONDERFUL weekend!

Rubbah hugs,
Selene Kempton
Thursday, March 31, 2011

More Baby Steps Girl... End of Sale A Bration

First a shout out, to all of you that purchased my mini box tutorial today and yesterday!

I really appreciate you and hope you love your new little box template!

I couldn't make little boy congratulations cards, without making little girl ones! I zipped over to split coast this morning and found this weeks' sketch challenge!

So, something that I failed to mention yesterday.. my customers have been going CRAZY over something so totally simple!

It all started when I was at a workshop and I was showing things you could do with the big shot.. I embossed the flap of one of my cards, then they were all doing it! Then, some of my club members who were present are all doing it too! Have you tried just embossing the envelope flap? It makes the envelopes look SO DARN PRETTY!..

In case you missed it yesterday, you can click here to view the Sale A Bration catalog one last time. f you would like to place an order, you can email me at e.selene@verizon.net or give me a call at 978-423-9994. Prefer to shop online? Click here to go to my online store.

This is one of the free substitution sets from the book that you can earn with every $50 purchase, but today is the last day!

Supplies used on this card,
Whisper white cardstock
melon mambo cardstock/marker
regal rose DSP/marker
117649 Pinking Hearts Border Punch
117335 Polka Dot Embossing folder
and some GORGEOUS Whisper White Organza ribbon... 114319. Can you believe this ribbon is ONLY $5.95 for 15 yards? It's so stunning and is the perfect addition to baby and wedding cards!

Measurements:
Base: 11 x 4 1/4" scored and folded in half at 5 1/2"
Layer 2: Marina Mist Card Stock 5 x 3 3/4"
Layer 3: Whisper White 4 7/8" x 5 5/8"
Layer 4: 3 1/8" x 4 5/8" Melon Mambo Card stock
Layer 5: 3 x 4 1/2 Regal rose DSP
Layer 6: 1 5/8" x 4 1/8" Melon Mambo Card stock
Layer 7: 1 1/2" x 4" Regal Rose DSP
Layer 8: 3 1/8" x 2 1/2" Melon Mambo Cardstock (I used the pinking hearts border punch on this layer)
Layer 9: 3" x 2" Whisper White

I inked the main image with markers... Another simple but gorgeous baby card!

Rubbah hugs,
Selene Kempton!
Wednesday, March 30, 2011

One More Day to Sale-A-Brate ~ Baby Steps

Boy, it's been quite the Sale-A-Bration, with so many wonderful freebees to choose from! Click here to view the Sale A Bration catalog one last time. After tomorrow, the products within will be gone forever!

If you would like to place an order, you can email me at e.selene@verizon.net or give me a call at 978-423-9994. Prefer to shop online? Click here to go to my online store.

This is one of the free substitution sets from the book that you can earn with every $50 purchase. I have been getting all sorts of stamps that have been on my wish list because of Sale A Bration

I'm going to need a baby congratulations card soon! My AWESOME sister in law Amy is pregnant and she's due to have her second little boy any day now! I thought it was time to make her a card, so that I have it to send when the big moment arrives. I'm so excited for her and her hubby Patrick! While I was at it, I made 3 more of these to put on the rack at the florist shop that will be selling my work from now on! I'm feeling very blessed to be receiving an opportunity right when I need it.

Supplies Used on this Project:
100730 Whisper White Paper
107301 Whisper White Envelopes
119682 Marina Mist Paper
119275 Marina Mist Taffeta Ribbon
117649 Pinking Hearts Border Punch
117335 Polka Dot Embossing folder
117152 Patterns Designer Series Paper
FREE ~ 123863 Baby Steps SAB free stamp.

Measurements:

Base: 11 x 4 1/4" scored and folded in half at 5 1/2"
Layer 2: Marina Mist Card Stock 5 x 3 3/4"
Layer 3: Whisper White 4 7/8" x 5 5/8"
Layer 4: Marina Mist Designer paper from the patterns pack 5 x 1/2" strip (you can get 48 from one piece of paper)
Layer 5: 3 1/8" x 2 1/2" Marina Mist Card stock (I used the pinking hearts border punch on this layer)
Layer 6: 3" x 2" Whisper White

Double Bow was made with Lee Conrey's bow maker and the Marina Mist Taffeta Ribbon.

Directions:
1. Tie a bow and set aside
2. Using Markers, Ink the Baby Steps Stamp and stamp on layer 6
3. Using the pinking hearts border punch, create the border at the bottom of layer 5.
4. Run layer 3 through the big shot with the polka dot embossing folder.
5. Assemble the rest of the pieces... :D Easy Peasy.. I used dimensionals to attach layer 5/6. and mini glue dots for the bow!

It took me longer to write the tutorial than it did to make the cards! I hope you have fun and have time to stamp one!

Have a wonderful day!
Selene Kempton
Saturday, July 10, 2010

Operation Baby Girl Sherman Shower

Good Morning Fun Stampers!

Today I'd like to share a project that my friend Pam and I stamped for her daughter's baby shower!

Pam called me on thursday, frantic, because her daughters baby shower had to be moved to to a family illness, and they needed to get 40 invites in the mail in a matter of 1 day!

I had this idea before and used it for a few things, but I thought today would be a good day to share with you!

This darling little purse is very easy to make using the big shot. I started with an 8 x 4" piece of cardstock (cut from a 12 x 12 you get 4 pieces) and scored it in half at 4".

To be most efficient, I cut a 4 inch piece off a 12 x 12" paper, then scored the remaining 8 x 12 inch piece at 4" before cutting my three 4x8 inch strips.. This means that I only scored twice for the 4 cards.. So we used 10 sheets of 12 x 12, and 10 of 8 1/2 x 11. Clear as mud?

Next, I ran the piece through the big shot using the square scallop die. Because my cardstock is only 4" wide, it fits between the scallops on either side perfectly.

The handle is the scallop oval die, and I was able to cut 4 at a time using 1/4" sheet of 8 1/2 x 11" cardstock.

We used tombo, multipurpose adhesive to adhere the purse straps, and glue dots in the corners to hold the pocket together. I used my handy bow maker to make perfect bows and Pam stamped the front of all the invitations.

We used some retired DSP and Pam helped me use up the last of my amethyst cardstock. Next. we cut a designer series paper down to 4" and used that sheet to make the faux ribbon with the brand new Dotted Scallop Ribbon Punch. Isn't that stinkin cute??

So here is a view of the inside of the pocket...


Next, we did the invitation... I blocked out some of the info with photoshop, but here's the info so you can see how we did it.. I set up a 3 column document in word, and we color matched to razzleberry. :) Told ya, wicked cute!!

The three inserts (4 for those needing directions) were printed, matted, and stuck together with a brad so nothing would get lost in the pile.
  1. The main directions were first
  2. then a poem to request a book instead of a card
  3. Registry information
  4. Directions to the event.
Here's a peek at the cute little book request card, and we hand stamped the book worm from the stamp set in the current mini catalog. Baby Girl Sherman is going to be a smart one!
That's all for today. I hope you all have some time to stamp something fun!

Selene Kempton
Sunday, April 11, 2010

Oh Baby, Baby, BABY!!!

Today was a wonderful day. I spent some time with family celebrating new babies on the way. My hubby's cousins (who are sisters) are both pregnant.

One sister is pregnant with one and does not want to know what she's having, and her sister is pregnant with twin boys!

Stamps:
Fox and friends, page 31 of the occaisions mini
Paper: Whisper white, bermuda bay, soft suede, and Bride DSP.
Ink: Bermuda bay, soft suede
Accessories: latte buttons, soft suede polka dot grosgrain ribbon, glue dots.

I cut two giraffes, (one for each baby) and then attached them with dimensionals.The striped irridecent pattern on the front is from the "bride" designer series paper. So Darn Pretty to work with!!! I ran regular sewing thread through the button to tie my "faux bow".. Meaning.. I didnt actually tie a bow. I looped it over onto itself to make it look like i tied a bow.. I think the thread on top, coming throught the button makes it so delicate looking!

I really love the triple tag... Hello Baby.. Baby... It's going to be fun to have 3 new babies in the family!