Saturday, December 28, 2013

Christmas Card Project Parade~ Whoop Whoop!

Good Morning Friends!

Over the season I have made a TON of cards with the intention of blogging them.  :)  Well, Christmas is all done and I wanted to take the time to clean out my "blog" folder.  :)  So here is a Christmas parade of card ideas for you. 

I hope that you had a VERY awesome holiday surrounded by those who love you!

 Silver glitter glue on the embossing folder.

 I believe in soft suede!

 This one is pretty cool, it has a flap inside that extends...


 Warm Wishes Snow Man!

 Envelope punch board, file folder card

 Grunge Christmas!  Make a wish!

 Striking Red and White beauty!

 More Snowmen!

Beautiful Poinsettia 

 Joy to the World!


Color Me Christmas


 Believe Card for Cards for Hero's Day
 Color me Christmas
 Color Me Christmas


 Fancy folds Color me Christmas


If there are any products that you "have to have" the last day to order from the holiday Catalog is coming up on January 2nd.  Thank you for stopping by today for a little inspiration! 

Love,

Selene Kempton
Creative Coach
Thank you for your orders with me  Shop here anytime!
Thursday, December 5, 2013

12/5 Stampin Up! Season of Style, Color Me Christmas, and Greetings of the Season

Good Evening Friends! 

It was a happy day here at the studio.  This is one of the six cards we made in tonight's Season of Style Class.  Such a beautiful, simple, easy to reproduce card!  

Supply list 
Stamps: Color Me Christmas, Greetings of the season
Ink: Cherry Cobbler Ink Pad, Stazon Black and Old Olive, Cherry Cobbler, and Crumb Cake Markers
Paper: Whisper white, cherry cobbler, season of style designer paper, Crumb Cake Card Stock
Accessories: champagne Glimmer Paper.

That's my daily share of inspiration for you today.  Thanks so much for stopping by!

Selene Kempton

Creative Coach
Thank you for your orders with me  Shop here anytime!
Tuesday, December 3, 2013

12/4 Season of Style, Color Me Christmas, and Greetings of the Season,

Good Morning Friends!!

I have another card to share from my upcoming class this Thursday.  I love this little reindeer from the Color Me Christmas Stamp set.  I paired him up with the Greetings of the season Stamp set and some Whisper White Bakers Twine.   Isn't he adorable!  

The Chevron Border was made in seconds with two punches on my border punch!  Dude, I love that punch!!  The card uses a whisper white insert measuring 5 1/4" x 4" so you see through the punch to the white.  So super cute!!  The designer paper is cut 1 3/4" x 5.5"  That's it!  Straight, marker color, easy peasy.  So, how about a supply list?

'
Supply list 
Stamps: Color Me Christmas, Greetings of the season
Ink: Cherry Cobbler Ink Pad, Stazon Black and Old Olive, Cherry Cobbler, and Crumb Cake Markers
Paper: Whisper white, cherry cobbler, season of style designer paper
Accessories: Whisper White Seam Binding, Chevron Border Punch

Thanks so much for stopping by today!

Here are this week's weekly sales:
www.stampinup.com/ECWeb/ProductDetails.aspx?productID=130017&dbwsdemoid=2004330


Wisteria Wonder 3/4" Chevron Ribbon, Item 130017
Was: $8.95 Now $6.71
www.stampinup.com/ECWeb/ProductDetails.aspx?productID=126882&dbwsdemoid=2004330
 
Merry Minis Punch Pack, Item 126882
Was: $16.95 Now $12.71


http://www.stampinup.com/ECWeb/ProductDetails.aspx?productID=125599&dbwsdemoid=2004330


Hearts Collection Framelits Dies Item 125599
Was $26.95 Now $20.21
http://www.stampinup.com/ECWeb/ProductDetails.aspx?productID=127811&dbwsdemoid=2004330
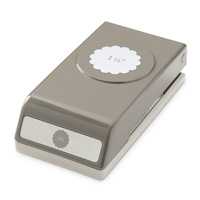
1-1/4" Scallop Circle Punch 127811
Was: $15.95 Now: $11.96

www.stampinup.com/ECWeb/ProductDetails.aspx?productID=121812&dbwsdemoid=2004330
Fun Flowers Bigz L Die, Item 121812
Was: $32.95 Now $24.71


Think Back Photobook Templates - Digital Download Item 133021
Was $19.95 Now $11.97
www.stampinup.com/ECWeb/ProductDetails.aspx?productID=125592&dbwsdemoid=2004330
Paper Doily Sizzlits Die, Item 125592
Was: $21.95 Now:$16.46

Selene Kempton

Creative Coach
Thank you for your orders with me  Shop here anytime!
Monday, December 2, 2013

12/3 Season of Style, Christmas Collectables, Greetings of the Season

Good Morning Friends! 

I have been running classes around the Season of Style Designer series paper.  In the first class in the series, we made these adorable gift bags. The bags were designed by my friend Ronda Wade.

 
Thursday night, we will be making SIX beautiful cards that match the bags, like this card. This one uses the season of style designer series paper, and is my design. :)

Such a simple card, we stamped greetings of the season, in cherry cobbler right on the designer paper.  Then, just tie your cherry cobbler ribbon on.  Stamp the ornament and punch it out, pop it up with some dimensionals and you're done!  I love how beautifully simple this card is and how easy the trendy designer paper makes it to make a gorgeous card! 
Supply list 
Stamps: Christmas Collectibles, Greetings of the season
Ink: Cherry Cobbler Ink Pad
Paper: Whisper white, cherry cobbler, season of style designer paper
Accessories: Cherry Cobbler ribbon.

Super simple, quick, but GORGEOUS!!  Thanks so much for stopping by today!

With Gratitude,
Monday, November 18, 2013

11/18 Season of Style, Class 1 Gift Bags!!

Good Morning Friends!!  

I'm home from a week long vacation at Walt Disney World, and I'm working to get back in the swing of things today!  Only 1500 unread emails!  :) 

Do you have a TON of leftover designer paper?  Would you like to be able to make gift bags, quickly and with no fuss?  Check out this ONE HOUR CLASS for next week! 

This class Starts off a four class series to wrap up your holiday's pretty!

In one hour, learn how to make these gift bags, and leave with enough supplies to create 6 different gift bags! 

Click here to register for the event!

That's it for this morning!  I'm off to go have some stampin fun! :) I'm getting ready for my stamp clubbers this week! Thanks for stopping by today! 

Love,

Selene Kempton


Thursday, November 7, 2013

11/7 Regarding Dahlias ~ Hello, you!, clean and simple

Good Evening Friends!

I have a few minutes while I'm waiting for my class to arrive. I wanted to share this sweet card with you. 
This sweet stamp set, Regarding Dahlias makes a quick card in a snap!  Plus, the stamp set is very inexpensive, just $14.95 in clear mount.  I stamped the large flower with a tangerine tango ink pad and the hello you in Island Indigo, both on whisper white paper.  This surprising color combination is just GORGEOUS in real life! 

The white layer was embossed with the woodgrain embossing folder

Short and sweet, that's my little bit of inspiration for you today.  Thanks for stopping by to see me. 

Love,


Selene Kempton

Wednesday, November 6, 2013

11/6 Santa's List, and I got arrested!!

Good Morning Friends! 

Today I have just a quick share for you.  I'm off to stamp with assisted living.  I just love stamping with them.  Some of them don't have the opportunity to get out of the house, and it makes me so happy to hang out and share what I love with them.  

Today, I'm sharing a project for tomorrow's fancy folds class!  We will make this beauty with the envelope punch board. 
 

Aren't the colors just dreamy?  The base, and the ribbon are pool party, and santa is stamped in the new smokey slate gray, and punched out with a 2 1/2" circle punch.  

I spent the weekend at a creative memories scrapbook retreat.  My new friend Marjorie, it was her last retreat and she brought in 3 vendors to meet her customers.  We had so much fun!  In between the laughter, they arrested me!  I think they pegged me pretty well.  I had to stifle my laughter enough to scowl and get this fun shot.  What do you think??  
I have a pretty full calendar this week with follow up's and thank you's for orders from the weekend, and Saturday I'm off to visit Mickey mouse!!  :) 


Stamps: Santa's List
Ink: Smokey Slate Ink Pad
Paper: Pool Party, Winter Frost Specialty Designer Paper
Accessories:  Envelope Punch Board, pool party ribbon, Tea Lace Paper Doilies, Pretty print Embossing folder

That's it for this morning!  I'm off to go have some stampin fun! :)  Thanks for stopping by today! 

Love,

Selene Kempton
Thursday, October 31, 2013

10/31 Thankful Thursday

Well, my friends, it was a CRAZY month!  I just finished club and I'm headed out to a crafting retreat this weekend. It's Thankful Thursday at stampin up and they have some awesome specials on ribbon.  In addition there's a weekly sale that you can check out at the link right there <--. 

So, in honor of Thankful Thursday, here's what I'm thankful for.  My Ballerina Fairy Princess...

My sweet hubby... This photo was taken by my friend Tami White at our Annual Breast Cancer Event!
 
And.. Drumroll!!!  

I'm very thankful for you!!  

There were  so many people that participated in the success of this year's Stamp Out Breast Cancer Event.  Every single person made a difference and together we raised $3270 for Breast Cancer.  Check out our team site here.


If you're interested in still helping, check out the link to get a planner.  100% off all money donated goes back to the charity!  

Much Love,


Selene Kempton
Thursday, October 17, 2013

10/17 Thank You Thursday, Label Love, One Day Sale!!

Good Morning Friends!

How appropriate to have Thank you Thursday.  I have so much to be thankful for.  We are heading into our Fourth Annual, Stamp Out Breast Cancer Event this weekend, and we are already more than half way to goal.

Demonstrators have purchased the class planners from across the globe and are planning their own charity fundraisers.  Others have purchased the planner to help with their Stampin' Up! businesses, and have been able to prep, print and run  out the door to workshops.  The workshop sheets have a printable shopping list and blow by blow directions on the front.  I've heard from demo's who have already used my planner and they are raving!  Click here to check it out.  100% off all money collected goes to our team at making strides.

If you are not a demonstrator, but would like the detailed directions for those cards, click here to make a donation to our team.  We will forward you the directions after.  Just note, if you make the donation as "Anonymous" we are unable to see the donation and send you the directions. 

When I saw today's Thank you Thursday post from Stampin' Up! showcasing what is on sale, I knew today was the day to post my Label Love card! Guests got to choose to make a birthday card or this one.. we used every stamp in the set that day.  It's a gorgeous stamp set! 

I make so many cards, that I have a cue of them waiting to post for you. :)  This one I made months ago at my new catalog 20 card rollout bash!  We made 20 different cards that day and this was one of them.  It features TWO of the items that are on sale today!   I love that I have one at "the ready" to show you how to use the awesome items that are on sale today for just one day!!   Got to love that!! 

Here is the card that we made.  So first, let me tell you about the sale...

This week’s Thank You Thursday is all about punches—namely the Artisan Label, Bitty Butterfly, Hexagon, Mosaic, and Pansy Punches.


Artisan Label Punch Item #130920
Regular Price: $15.96 US
Discounted Price:$11.96 US


Bitty Butterfly Punch Item #129406
Regular Price: $15.96 US
Discounted Price:$11.96 US


Hexagon Punch Item #130919
Regular Price: $15.96 US
Discounted Price:$11.96 US


Mosaic Punch Item #131267
Regular Price: $15.96 US
Discounted Price:$11.96 US


Pansy Punch Item #130698
Regular Price: $15.96 US
Discounted Price:$11.96 US
At Stampin’ Up! we are known for how our products coordinate, thus making the creative process easy! All of the punches that are featured today have coordinating stamp sets.

 I just love Black and White and one other color!  This card really is a stunner in person and it's pretty easy to put together. 

I started with a square punch and punched out 4 pieces of Designer paper from the Modern Medley Designer Series Paper.  I attached those to a basic black base layer measuring 3 1/2" square. 

Then I punched three pieces out of the melon mambo cardstock.  Two butterflies and a scalloped circle punch.  Those were previously embossed with the fancy fan embossing folder. 

Next, we stamped the Mr. & Mrs. from the Label Love stamp set.  We added some of the vintage ribbon and we were good to go!  :) 

Two more days till the fundraiser at harmony hall in Dracut, MA!  Won't you join us?  For LOTS more details, click here to see the flier that gives more details about the event! 

Much Love,


Selene Kempton
Wednesday, October 16, 2013

10/16 Chalk Talk & Everything Eleanor, Chalkboarding and Embossing Techniques

Good Morning Friends!

Just a quick project share with you..  Isn't this pretty? Chalkboarding is a hot trend right now in many different industries.  We made this card at embossing class last month, and it was one of my favorite projects.
To get started, here's a supply list.

Stamps: Chalk Talk and Everything Eleanor
Ink: Versamark Ink
Paper: Soft Sky, Basic Black, Whisper White
Accessories: Black Embossing Powder, White embossing Powder, White Chalk Marker, Heat tool, Soft Sky Seam Binding, Chalk Talk Framelit Dies

Save 15% if you purchase the stamp set and framelits in a bundle!  Here is a link to that: Chalk Talk Bundle

Now Some Measurements:
Base Layer: Soft Sky 8 1/2" x 5 1/2", scored and folded in half at 4 1/4"
Layer 2: Basic black 5 1/4" x 4"
Layer 3: (yours could be smaller) but I used a 1/4 sheet of Whisper white.  5 1/4" x 4"

Step by step:

Step 1: Start with the black paper and stamp the flourish from Everything Eleanor on your black card stock. 
Step 2: Pour the white powder on, and funnel the excess back into the jar and close it up.
Step 3: Grab a small paintbrush and brush any excess flecks of powder off where you don't want it on your finished piece
Step 4: Heat the White embossing Powder with the Heat tool until it melts.
Step 5: using the White Chalk Marker and a ruler, make the lines on the edges of the cardstock.  Note** it's much easier, to put the ruler on the "inside" edge of your cardstock and leave the part that is on the outside out when drawing the lines.  Set the Black Layer 2 aside for a moment.
Step 6: On the whisper white Layer, use an embossing buddy to swipe any imperfections off the paper, and wipe your fingers too.
Step 7: Stamp with versamark the main "tag image" from Chalk Talk on top of the Whisper white cardstock. 
Step 8: Pour the black powder on top, and funnel any excess back into the jar.
Step 9: use a paintbrush to brush off any pieces of excess powder before heating.
Step 10: Heat the Black Embossing Powder with the Heat tool until it melts.
Step 11: Use the  Chalk Talk Framelit Dies to cut out the focal point and set aside for a moment.
Step 12: tie a bow with the Soft Sky Seam Binding Ribbon, then run a 6" piece along the front of the card.  Attach to the back using two glue dots.
Step 13: Use adhesive to finish putting your card together, and glue dots to attach the bow.
Enjoy!

I hope you are leaving inspired to try this technique out.  Embossing is one of my customers favorite techniques, because it's like magic!  Thanks so much for stopping by today!

Much Love,


Selene Kempton