Friday, October 28, 2011

Saturday Sketch Challenge 227 ~ Recycling toothfairy

Good Evening Friends...
Another simple sketch from your stampin411 operators.

Before we get started, I have a cute story my daughter told me today. Yesterday, during breakfast she lost a tooth. She *gasp* forgot to check this morning to see if the tooth fairy left her something for her tooth. Well her little friend Rylee has been getting $5 a tooth, so Alexis was sure that she better be getting the same.... awesome. Is that the effect of inflation now?

Anyways, Alexis told me today that when the tooth fairy takes a tooth from under a child's pillow that she gives it to a new baby so that he/she may have it until their big teeth grow in... Awwwwweeee. These are the times when I really love that I pick her up after school. I'll be working all weekend and through the middle of next week at my newborn photography job, but a part of me will wonder if God has given one of her teeth to a new baby like she said! My creative sweet thing! I guess if I have to be working away from my family on a weekend, that it will be good to keep them with me (in my head) while I'm there. Thanks for letting me share that. I hope it made your heart smile.

On to this week's simple sketch. I really did keep it simple and stuck to the sketch! :D I got a quick peek at some of the operator submissions and chuckled a bit to see that Tammy and I chose the same paper! That is bound to happen! :D
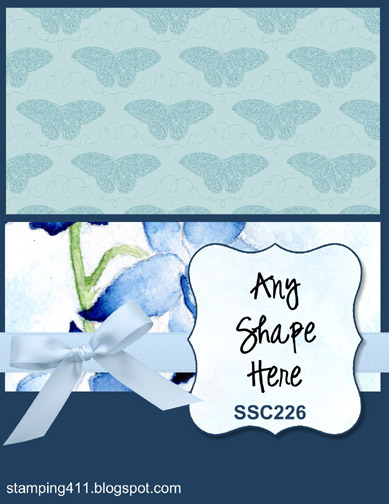
Measurements:
Base: 11 x 4 1/4" scored and folded in half at 5 1/2"
Layer 2: Espresso 5 1/8" x 3 5/8"
Layer 3: Holiday designer paper cut 5 x 3 3/4".
Layer 4: Red satin ribbon and a gorgeous bow, using operator Lee's magic bowmaker
Layer 5: ornament punched shape..

You cant tell from the photo but I used shimmer white for the punched shape, so it's sparkly, then sponged the edges with real red to match the paper and ribbon.

I hope you have a wonderful weekend. We have a major snow storm ~ 6-10" of heavy wet snow in the forcast ~ (before Halloween) headed our way for this weekend. Say some prayers with me working in the middle of the storm... it is what it is... At least I can still stamp 4 fun!

Rubbah hugs,
Selene Kempton
Friday, October 21, 2011

Saturday Sketch Challenge 226 ~ My Girlie Ghost

Good Evening Friends,

This week's sketch over on stamping411 is my creation... Now, as I was looking at the sketch, I thought to myself... What was I thinking??? Those panels are a little weird for the background, ey?

Having seen some super cute projects over on 411 over the past few weeks, I decided to case some of our readers... I'm not sure where the original idea came from to use the owl punch to make a ghost, but I'm diggin it!!! You just punch one out, and cut the feet off. Flip him/her over and you're good to go!

I also went back in to punch the black circles for the eyes.. There's no stamping on this card... I used a white gel pen to make the *sparkle* in her eye and to write on the bag freehand.

For the candy corn, I cut some pumpkin pie and daffodil cardstock to 2" strips and glued it on top of some shimmer white. Then I freehand cut the candy corn.. isnt it cute? I went from not knowing what to do with this sketch to something so creative, all because of my cute little girlie ghost. If my daughter were to dress up as a ghost for halloween, she would require lots of glitter and of course a BOW in her hair! So I thought this would be a good girlie ghost card. I added the scallops to the top of her loot bag with a gel pen also. I sponged the ghost with grey. (i thought black would be too much) and it looks like she's been out trick or treating at the campground. (which we did on Columbus day weekend).
I'm not sure if you can see the black satin ribbon in this picture. I put a layer underneath the thin ribbon in front of the candy corn, but didn't want to add a weird stripe to the front of my candy corn.

On to measurements:
base: shimmer white 8 1/2" x 4 1/4" scored and folded in half at 5 1/2"
Layer 2: 5 x 3 3/4", pumkin pie
Layer 3: 4 7/8 x 3 5/8" basic black.
Layer 4: candy corn described above
Layer 5: 1/8" taffeta and 5/8 black satin ribbon (about 5" of each)
layer 6: owl punch upside down with the feet cut off to make the ghost
Layer 7: 1"square punch to make the bag, I cut it down to a rectangle and then rounded the corners of the bottom of the bag. then attached my scrap piece from making the bow to the handle.. no waste!!! love that!

I hope you have a wonderful weekend.
Rubbah hugs,
Selene Kempton
Monday, October 17, 2011

Greeting Card Kids ~ Finally Playing!

Good Evening Friends!

I just dig this stamp set and I'm so happy that I made some time to be in the studio today!

I'm getting ready for my Quarterly $2 Card Buffet class. People in attendance can come and make 1 card or 100 cards for $2 each to stuff their stamping pantries. This session is all holiday cards and I'll cover the big holiday's coming up.

Like I said, it was a JOY to be in the studio and stamp for me a little... Oh I have so much to tell you about this one..

I'm going to start with the top layer... I stamped the halloween image from greeting card kids onto whisper white card stock, then water colored it with markers and an aqua painter. I punched tit out with the 2 1/2" circle punch.... okay... So are you ready for how I matted it.. It's not perfect, but it adds the splash of color I wanted. I took FOUR scalloped oval punches in Pumpkin and just stuck them to the back, lining them up (and shlopping them together) as I went. I also added some smootch accent ink to the girls dress and the broom, adding a bling across the broom.. (a broom fit for a princess, don't cha think?)

The base layer was cut from black cardstock 8 1/2" x 5 1/2", scored and folded in half at 4 1/4"
Layer 2: (inside and out) is wisteria wonder 5 x 3 3/4"
Layer 3: 4 7/8" x 5 5/8" in concord crush. I pre embossed the spider design then used a black inkpad to directly apply ink to the surface of the paper. (thus the direct to paper technique)
I added some wisteria wonder ribbon, and the sentiment is stamped on pumpkin and punched, then cut short and tucked under the ribbon.

It was a pure labor of love. I adore this stamp set and I miss just playing. If you're local to me and would like to pop into the buffet, just BYOA (bring your own adhesive) and there will be a multitude of cards designed and prepped for your enjoyment. make one of each, or clean out a whole box of one design, it's all up to you!

Thanks for stopping by today. Thanks to those who take the time to read my posts and leave me comments!

Rubbah hugs,
Selene Kempton
Friday, October 14, 2011

Saturday Sketch Challenge 225 ~ Merry Snowglobe

Good Evening Friends!

I'm so very excited about Gretchen's sketch this week over on stamping411. I had so much fun putting this project together. I started with the sweet snowglobe stamp. It's a single stamp that coordinates perfectly with a 1 3/4" circle punch and the circle treat cups.

First I inked the stamp in cobbler, marina mist, garden green and black ink using markers. I stamped it on a 3 x 3 whisper white square, then took tombo multipurpose adhesive and applied it to the top of trees, house and the snow flakes using the design of the stamp as a jumping off point. Next I punched the image out using my 1 3/4" circle punch. I cut a piece of marina mist cardstock to 3 1/4" and laid my white piece on top to use it to line up my circle. I stuck the circle with the stamped image first, then lifted the large white piece that layers ontop of the marina mist layer. I added the self adhesive treat cup next, and used the punched image as a placemarker on where to put my cup. Before sticking it down, I added a small amount of dazzling diamonds to my snow globe. I added some adhesive to the 3" white layer and laid it ontop of the sweet treat cup

Then I cut the designer paper layer to 4 7/8" x 3 5/8" and stuck it to a whisper white layer that measures 5 x 3 3/4". I used the sketch to determine where to stick my white satin 5/8" ribbon. I ran a piece of 1/8" marina mist taffeta across, again just sticking to the sketch, and I tied a bow where it meets the base of my snowglobe. Next, I stuck the whole top on the base layer.

The marina mist base layer measures 8 1/2" x 5 1/2", and was scored and folded in half at 4 1/4". Totally fabulous sketch this week! I sure hope you have time to play along with us!

Thanks for visiting! Rubbah hugs,
Selene Kempton
Friday, October 7, 2011

Saturday Sketch Challenge 224 ~ 30 Minute Card

Here's a card that I literally threw together in 30 minutes... I made this card (late again) on Wednesday morning. I had about 30 minutes to create this card before leaving for work.

It started as a Christmas card and ended up as a birthday card. :D

When I saw the sketch over on 411. I instantly saw a present in the spot all the way on the right.. So funny what a little inspiration can lead to. This card came out kind of dark in the photo, but it's so darn sparkly in real life.. It's like poke you in the eye sparkle! :D

So how about some measurements?
Base: 8 1/2" x 5 1/2", scored and folded in half at 4 1/4" marina mist.
Layer 2: whisper white, 5 1/4" x 4. embossed with the "brandy new" snow Burst embossing folder
Layer 3: marina mist taffeta with a big ol' double bow. :)
Layer 4: sparkle paper, cut to 2x5
I used a lot of punches...
1 1/4" punched out of the already embossed paper, and hidden in the layers.
1 3/8" circle punch out of scrap marina mist
1 1 /4" square punch for the white present,
1 3/8 square punch for the marina mist layer
large oval punch for the sentiment (came from the petite pairs stamp set)

Whew!! well that's all for today! We're headed to the mountains for some much needed R&R with a big group of camping friends! I haven't had a day off in about 3 weeks, so I'm looking forward to at least one day where I can sleep in and not get up to get someone off to school/work! :D

Please check out what my girlfriends are up to over on stamping411 this week. I cant wait to see their awesome creations!

Rubbah hugs,
Selene Kempton