Friday, November 18, 2011

Saturday Sketch Challenge 230

Good Evening Friends!

It's time for another fabulous sketch challenge from your friends at stamping 411! This week Gretchen was at the sketch board. When I saw this sketch, I thought that I wanted to do something with this fantastic set I purchased of the holy family.

I stamped the image on watercolor paper (2 3/4" square) and watercolored it with markers. I should also mention that I drew in the cow's spots randomly. I had this card made quite a while ago for this sketch challenge, and I showed someone at work. She had me make 8 of them for her. Too cool! It did take a bit of time to water color the image, but I find that relaxing.

How about some measurements:
Base 11 x 4 1/4", scored and folded in half at 5 1/2"
Layer 2: 5 x 3 3/4" cherry cobbler
Layer 3: 4 7/8" x 3 5/8" vanilla (embossed with the vintage wallpaper embossing folder)
Layer 4: scalloped square from the big shot
Layer 5: watercolor paper, 2 3/4" square

it's really a clean and simple layout. I sponged the 3rd layer with cobbler to soften it up a little. I hope you all have a wonderful weekend!

Rubbah hugs,
Selene Kempton
Friday, November 11, 2011

Saturday Sketch Challenge 229

Good Evening Friends,

I'm looking at this picture I took weeks ago and it's looking a little dark to me! I don't have time to take another picture today... It's my anniversary and my honey and I both have the day off.

It's actually pretty cool that 11/11/11 is our 11th wedding anniversary! We didn't even plan it that way. We lined up a babysitter and have no plans at all, but I'm sure that we'll find something to do!

Also ~ being Veterans day, I want to say thank you to all those who are currently serving and those who served our country in the past. I realize some of the huge sacrifices you and your family makes to protect our rights and freedom. Thank you just doesn't seem to cover it. To my dad who served in the air force and so many others, wishing you every luxury and joy today!

When I saw this sketch by Gretchen this week I used it for inspiration but most certainly took some creative liberties with it. I used this card for my stamp club this month and the girls really loved it.

It went together in about a minute because I had everything prepped. Isn't it wonderful when clean and simple comes out so beautiful? The stamp set is Hand Penned Holidays, I think every single club member wants this set now, the script is so beautiful. The designer paper is mocha morning, and this print has a wonderful flocked pattern, that's fuzzy when you run your finger over it. It's like a warm blanket on a snowy day.

Paired up with the real red satin ribbon and the glimmer paper ornament, it really pops without too much effort! :D I used this WONDERFUL tutorial on how to tie a flat knot by Patti Chesky. You can check out her video here.

So how about some measurements?

Base 8 1/2" x 5 1/2", scored and folded in half at 4 1/4"
Layer 2: Whisper white 4 x 5 1/4"
Layer 3: Black Cardstock 4 1/8" x 2 5/8"
Layer 4: Flocked Black DSP (mocha morning) cut to 4 x 2 1/2"

I used a 1/16th circle punch to feed the glimmer brad through the middle of my punched ornament and popped it up on a few dimensionals. Pretty pretty card.

I hope you have a wonderful weekend and have time to play along with us today!

Giving Thanks for Friendship ~ I'm back!

It's been a really wonderful week. At the beginning of November I gave my notice at the hospital for my photography position. Although I love working with newborns, the position just isn't "as advertised". My daughters' tuition is secured for the rest of this school year, so I'm moving back to stamping full time!

This week I've had several reminders that I'm doing the right thing. I really love Stampin' Up and sharing what I love and what I know. I was reminded at a workshop I did last night for Elaine and friends. I showed them all my tips and tricks for using our products with ease and was reminded that I am doing exactly what I'm supposed to be doing, at exactly the right time and with the right company. I'm surrounded by friends and people who love me and support my decision to return to doing what I was meant to do. Sometimes you have to go through it to see what was in front of you the whole time. I forget that everyone just doesn't make cards.. it's so second nature for me. Does that make sense? Anyway, it was a wonderful week.

This morning, I'm reminded again why this is what I'm supposed to be doing. My friend, who shall remain nameless, has some wonderful friends who want to do something nice for her and contacted me to help. They asked me what she likes and if I can help them place a "gift" order for her. Later today, she will receive this card and a few items that her friends picked out (with my assistance) so that she'll be able to enjoy making cards. Now, her friends aren't particularly crafty, they just want to make their friend happy. What a beautiful thing that is to witness! My friend, who is so deserving of such friendships is going to be so surprised and excited!

So here we go.. This is my giving thanks card for my anonymous friend who will be receiving the gift of stamping today and many of the items she will need to recreate this card!

Speaking of friends, I haven't had time to play along with the awesome sketch blog mojo monday in quite some time, and this morning, I decided to pull some inspiration from their sketch this week. So away we go...

So how about some measurements:
Base 8 1/2 x 5 1/2", scored and folded in half at 4 1/4", vanilla
Layer 2: soft suede 5 1/8" x 3 7/8"
Layer 3: Morning Mocha DSP 5 x 3 3/4"
Layer 4: I punched a 2 1/2" circle from one of the patterns of cardstock, then matted it with 4 scalloped oval punches.. it makes a really wonderful background for that circle
Layer 5: 2 x 5
Layer 6: 1 3/4 x 4 1/2" dsp again. I used a square punch to make the V in the paper, then just used a pair of snips to get layer 5 to match. It makes a nice clean square.
Layer 7: soft suede 1 5/8" x 3 3 5/8 (note this is just 1/8" bigger than layer 8 to matte the sentiment)
Layer 8: Very Vanilla 1 1/2" x 3 1/2"

Off to go play stamping santa clause! This is how it's supposed to be! Thank goodness.

Rubbah hugs!
Selene Kempton
Friday, November 4, 2011

Saturday Sketch Challenge 228


Good Evening Friends!

It's time for another Saturday sketch challenge from your Stamping411 operators.

This week's sketch has a few more elements than our normal clean and simple type sketch, but I really dig it!

It still went together pretty quickly. I love to watercolor with markers, it's one of my favorite things to do. When a customer asks me about my technique the biggest thing I can tell them is that it's about where NOT to put color, as much as where to put color. In this case, the light looks like it's coming up from the snow that Santa is standing, So the light source is bottom right. To color the image I started by drawing "L" then gently blending the color to the right in stages. If I wanted to add more color, I just scribble on a plastic bag and use my aqua painter to pick up the color. I had so much fun! I'm still using up last years batch of watercolor paper. My paper was cut into 4 pieces at 2 1/2" x 1 7/8" then matted with a 2 x 2 5/8" piece of vanilla

The scalloped circle layer underneath my focal point and the oval on top was punched from the second layer, then I just covered it up with my designer paper. and stuck it to the card. So it's like reverse scraps. :D

My base layer measures 5 1/2" x 8 1/2", at it was scored and folded in half at 4 1/4"
Layer 2: 3 3/4" x 5"
Layer 3: 3 5/8 x 4 7/8"

I dig the scalloped dotted grosgrain ribbon in cobber, it's so pretty and it's reversible.. so if you want, you can flip it over for a non polka dot side! I love that!

I hope you have time to play along with the operators this week! We would sure love to see what you come up with using this fun sketch! For more inspiration, check out what the operators are up to!

Have a wonderful weekend!
Rubbah hugs,
Selene Kempton
Friday, October 28, 2011

Saturday Sketch Challenge 227 ~ Recycling toothfairy

Good Evening Friends...
Another simple sketch from your stampin411 operators.

Before we get started, I have a cute story my daughter told me today. Yesterday, during breakfast she lost a tooth. She *gasp* forgot to check this morning to see if the tooth fairy left her something for her tooth. Well her little friend Rylee has been getting $5 a tooth, so Alexis was sure that she better be getting the same.... awesome. Is that the effect of inflation now?

Anyways, Alexis told me today that when the tooth fairy takes a tooth from under a child's pillow that she gives it to a new baby so that he/she may have it until their big teeth grow in... Awwwwweeee. These are the times when I really love that I pick her up after school. I'll be working all weekend and through the middle of next week at my newborn photography job, but a part of me will wonder if God has given one of her teeth to a new baby like she said! My creative sweet thing! I guess if I have to be working away from my family on a weekend, that it will be good to keep them with me (in my head) while I'm there. Thanks for letting me share that. I hope it made your heart smile.

On to this week's simple sketch. I really did keep it simple and stuck to the sketch! :D I got a quick peek at some of the operator submissions and chuckled a bit to see that Tammy and I chose the same paper! That is bound to happen! :D

Measurements:
Base: 11 x 4 1/4" scored and folded in half at 5 1/2"
Layer 2: Espresso 5 1/8" x 3 5/8"
Layer 3: Holiday designer paper cut 5 x 3 3/4".
Layer 4: Red satin ribbon and a gorgeous bow, using operator Lee's magic bowmaker
Layer 5: ornament punched shape..

You cant tell from the photo but I used shimmer white for the punched shape, so it's sparkly, then sponged the edges with real red to match the paper and ribbon.

I hope you have a wonderful weekend. We have a major snow storm ~ 6-10" of heavy wet snow in the forcast ~ (before Halloween) headed our way for this weekend. Say some prayers with me working in the middle of the storm... it is what it is... At least I can still stamp 4 fun!

Rubbah hugs,
Selene Kempton
Friday, October 21, 2011

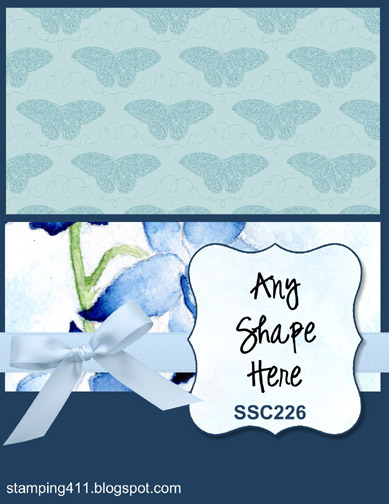
Saturday Sketch Challenge 226 ~ My Girlie Ghost

Good Evening Friends,

This week's sketch over on stamping411 is my creation... Now, as I was looking at the sketch, I thought to myself... What was I thinking??? Those panels are a little weird for the background, ey?

Having seen some super cute projects over on 411 over the past few weeks, I decided to case some of our readers... I'm not sure where the original idea came from to use the owl punch to make a ghost, but I'm diggin it!!! You just punch one out, and cut the feet off. Flip him/her over and you're good to go!

I also went back in to punch the black circles for the eyes.. There's no stamping on this card... I used a white gel pen to make the *sparkle* in her eye and to write on the bag freehand.

For the candy corn, I cut some pumpkin pie and daffodil cardstock to 2" strips and glued it on top of some shimmer white. Then I freehand cut the candy corn.. isnt it cute? I went from not knowing what to do with this sketch to something so creative, all because of my cute little girlie ghost. If my daughter were to dress up as a ghost for halloween, she would require lots of glitter and of course a BOW in her hair! So I thought this would be a good girlie ghost card. I added the scallops to the top of her loot bag with a gel pen also. I sponged the ghost with grey. (i thought black would be too much) and it looks like she's been out trick or treating at the campground. (which we did on Columbus day weekend).
I'm not sure if you can see the black satin ribbon in this picture. I put a layer underneath the thin ribbon in front of the candy corn, but didn't want to add a weird stripe to the front of my candy corn.

On to measurements:
base: shimmer white 8 1/2" x 4 1/4" scored and folded in half at 5 1/2"
Layer 2: 5 x 3 3/4", pumkin pie
Layer 3: 4 7/8 x 3 5/8" basic black.
Layer 4: candy corn described above
Layer 5: 1/8" taffeta and 5/8 black satin ribbon (about 5" of each)
layer 6: owl punch upside down with the feet cut off to make the ghost
Layer 7: 1"square punch to make the bag, I cut it down to a rectangle and then rounded the corners of the bottom of the bag. then attached my scrap piece from making the bow to the handle.. no waste!!! love that!

I hope you have a wonderful weekend.
Rubbah hugs,
Selene Kempton
Monday, October 17, 2011

Greeting Card Kids ~ Finally Playing!

Good Evening Friends!

I just dig this stamp set and I'm so happy that I made some time to be in the studio today!

I'm getting ready for my Quarterly $2 Card Buffet class. People in attendance can come and make 1 card or 100 cards for $2 each to stuff their stamping pantries. This session is all holiday cards and I'll cover the big holiday's coming up.

Like I said, it was a JOY to be in the studio and stamp for me a little... Oh I have so much to tell you about this one..

I'm going to start with the top layer... I stamped the halloween image from greeting card kids onto whisper white card stock, then water colored it with markers and an aqua painter. I punched tit out with the 2 1/2" circle punch.... okay... So are you ready for how I matted it.. It's not perfect, but it adds the splash of color I wanted. I took FOUR scalloped oval punches in Pumpkin and just stuck them to the back, lining them up (and shlopping them together) as I went. I also added some smootch accent ink to the girls dress and the broom, adding a bling across the broom.. (a broom fit for a princess, don't cha think?)

The base layer was cut from black cardstock 8 1/2" x 5 1/2", scored and folded in half at 4 1/4"
Layer 2: (inside and out) is wisteria wonder 5 x 3 3/4"
Layer 3: 4 7/8" x 5 5/8" in concord crush. I pre embossed the spider design then used a black inkpad to directly apply ink to the surface of the paper. (thus the direct to paper technique)
I added some wisteria wonder ribbon, and the sentiment is stamped on pumpkin and punched, then cut short and tucked under the ribbon.

It was a pure labor of love. I adore this stamp set and I miss just playing. If you're local to me and would like to pop into the buffet, just BYOA (bring your own adhesive) and there will be a multitude of cards designed and prepped for your enjoyment. make one of each, or clean out a whole box of one design, it's all up to you!

Thanks for stopping by today. Thanks to those who take the time to read my posts and leave me comments!

Rubbah hugs,
Selene Kempton