Saturday, February 28, 2015

Spring is in the air! Stampin' Up Nature's Perfection & Lovely Amazing You Sale-A-Bration Card Class

I am so happy February is OVER! Aren't you?

http://www.stampinup.com/us/documents/Flyer_SAB2_demo_Feb1715_US.pdf
My friends who live in Texas and Southern California keep sending pictures of their spring lawns. Although, this week even Texas had snow!  I just love the colors in this class.  The colors are so happy and make me long for spring! 

In the morning, there will be FOUR new Sale-A-Bration products available, only for the month of March.  For each $50 order, you can choose from one of these brand new product.  Click here for the complete flier.

If you want to see the full brochure, you can look at it here.

This class will be held on Thursday for my local customers. Click here to sign up for the class if you're local. I will also be sending directions to any long distance customers with any $50 order during the month of March.  I'm so grateful ~ thank you. 

The class uses the in color markers and aqua painters.  I really love working with aqua painters. 

If you are looking for a full listing of what I used, just check the list below.  The Nature's Perfection will be a Sale-A-Braion reward starting tomorrow. 

Thanks for stopping by today and letting me share some of the fun spring colors in this class with you! 

Before I let you go, I would like to ask the question.. If I offer this as a class to go, would you be interested?  Let me know what you think.

Love,
Selene Kempton
Stampin' Up! Creative Coach

Thank you for your orders with me  Shop here anytime!
Click here to join my team

Built for Free Using: My Stampin Blog
Thursday, February 19, 2015

2/19 Stampin Up, Guy Greetings, 40 Days of Kindness

Good Afternoon Friends,

Yesterday was Ash Wednesday.  I had been thinking about what I might give up for the 40 day's of lent season leading up to Easter.  I found an article online about a lady who did it all backwards last year.  Sounds kind of fun to me actually so I took a peek.  Here's a link if you're interested.  

The idea is simple, instead of giving something up, she suggested we should take something on.  And a lightbulb went off in my head.  Honestly, it's not unlike me to drop a card in the mail, or put a package out to a friend who might be struggling with something, but to do it every.single.day. for 40 days.  That is a challenge. 

The idea just came to me yesterday, and I had a dinner date with my family at our favorite sushi place, so I decided that our favorite waiter (the one we always get), was going to get this unused card with an envelope and a note with his tip.  That is my day 1.  I got a chuckle to see the look on his face.  He looked it over very carefully and his eyes lit up.  To understand that someone appreciates him.  It was simple but very cool.  It truly is the little things and I'm going to keep this going every single day.  Some days I may do just one thing, and others I may send two or three, but I will do it every day until Easter.  Hopefully, I'll be able to bless some folks around me and watch them, as they know how much I appreciate them and maybe, just maybe make the world around me a little easier or kinder. 

The card is one from my birthday stamp a stack last month.  My husband Brian actually helped me design this masculine card.  I wouldn't have made the same choices without him, but I love it!  He said "Guy's are simple ~ you cant keep adding stuff.. " and so we sat down and designed this beauty.  Here are some measurements if you need them. 

Base: Vanilla, 8 1/2 x 5 1/2", scored and folded in half at 4 1/4"
Layer 2: Basic Black 5 1/8" x 3 7/8"
Layer 3: Vanilla, 5 x 3 3/4
Layer 4: Newsprint 3 3/4 x 2 1/2"
Then just a few scraps for the layers on top.  I especially like the ribbon that isn't where the seam is, it's down a bit, like a belt on a pair of dress slacks.


Thanks so much for dropping by today and if you need it there is a shopping list at the bottom of this post that shows what I used.  Please make it a great day!


Love,
Selene Kempton
Stampin' Up! Creative Coach

Thank you for your orders with me  Shop here anytime!
Click here to join my team

Built for Free Using: My Stampin Blog
Monday, February 16, 2015

2/16 Stampin Up Blended Blooms, featuring Blendabilities, Project Life Love Story with Accessory Pack, and Crystal effects and Freshly Made Sketches

Good Morning!

I have a beautiful work of love to share with you today.  I really do love the clean and simple style of card, but there are some days, (after the second blizzard and countless snowstorm in less than a few weeks) that you just need to let loose and take all day to make a work of art.

Mr. Kempton: What did you do today?
Me: I made two cards.
Mr. Kempton: Oh, that's nice..
Me: Snickers, no that's all I did.. .and it was fun!

{love that man}

Oh I guess I filmed a video for a friend, and did some other stuff, but all I really did was this awesome card that was worth sitting down and blogging about.  I love that feeling when you create something so beautiful, and you know it came from you.  From your heart.  I love that feeling!


I guess we all need a day like that now and again, and I'm so glad I did it.  A day to listen to our creative side and make something pretty, with sparkles or in this case SHINE, lots and lots of shine.

This card is for my sweetheart after all, and he's worth a day, yes?  Here's a peek at the front card for starters.  You dont really catch the whole effect without the side angle shots, but it's so pretty!

I started with the most lovely sketch from Freshly Made Sketches.  Then my fun really started.

I guess I didnt snap a photo at the blendabilities portion of my project, but I cut a piece of whisper white cardstock to 3x4" and stamped it with Blended Blooms Stamp by Stampin Up, in momento tuxedo black ink.   I grabbed my brand new Bermuda Bay Blendabilities Markers (I call them blendies) and my color lifter and began coloring my flowers.  That took me a while!  It was a wonderful process.  Everyone deserves a day to just stay home and color. 

Next, I knew this was going to be a valentine for my love, so I grabbed the accessory pack from the project life love story pack, and found this cute sheet of die cut stickers.  They are cardstock on the top so you can make them into anything you want with a swipe of a pen! 

I used my blendies to create a gradation, and did the dark marker on the top and bottom of my word, and then ran the lightest marker through the middle (blending the color throughout, but I LOVE LOVE LOVE the effect!  :)  I placed this down on one of the premade project life cards "smitten" and stuck the forever right on top and trimmed the panel down to fit my card.


Next, I grabbed my crystal effects and made a thin coat layer over the top of my flowers, and let that dry for about 10 minutes.  Coat two, took about two hour to dry.  Here's the second layer.
You can still see some of my brush strokes in the crystal effects but it's really starting to pop and look pretty here.  You an also note, that I grabbed my soft sky blendabilities and outlined the flowers with the lightest color before the second coat.  I did that for a subtle shadow.  I think it looks super pretty now that it's all together.

When that layer was just about dry, I got goopy!  LOVE IT!!  It dried perfectly clear, and dreamy.  Note: a water based marker would have brought the color up into the crystal effects solution, so i love that with blendies, it sits right on top and I dont have to worry about my images getting muddy.  :)  {happy dance}


And I presented my studmuffin with this lovely work of art the next morning.  Oh my gosh, i just LOVE how thick and beautiful the crystal effects turned out.  Dreamy, yes?

Thank you so much for stopping by today!  I'm so grateful to be able to share with you.  If you are looking for any of the items I used, there is a complete shopping list below.

Love,
Selene Kempton
Stampin' Up! Creative Coach

Thank you for your orders with me  Shop here anytime!
Click here to join my team

Built for Free Using: My Stampin Blog

Thursday, February 12, 2015

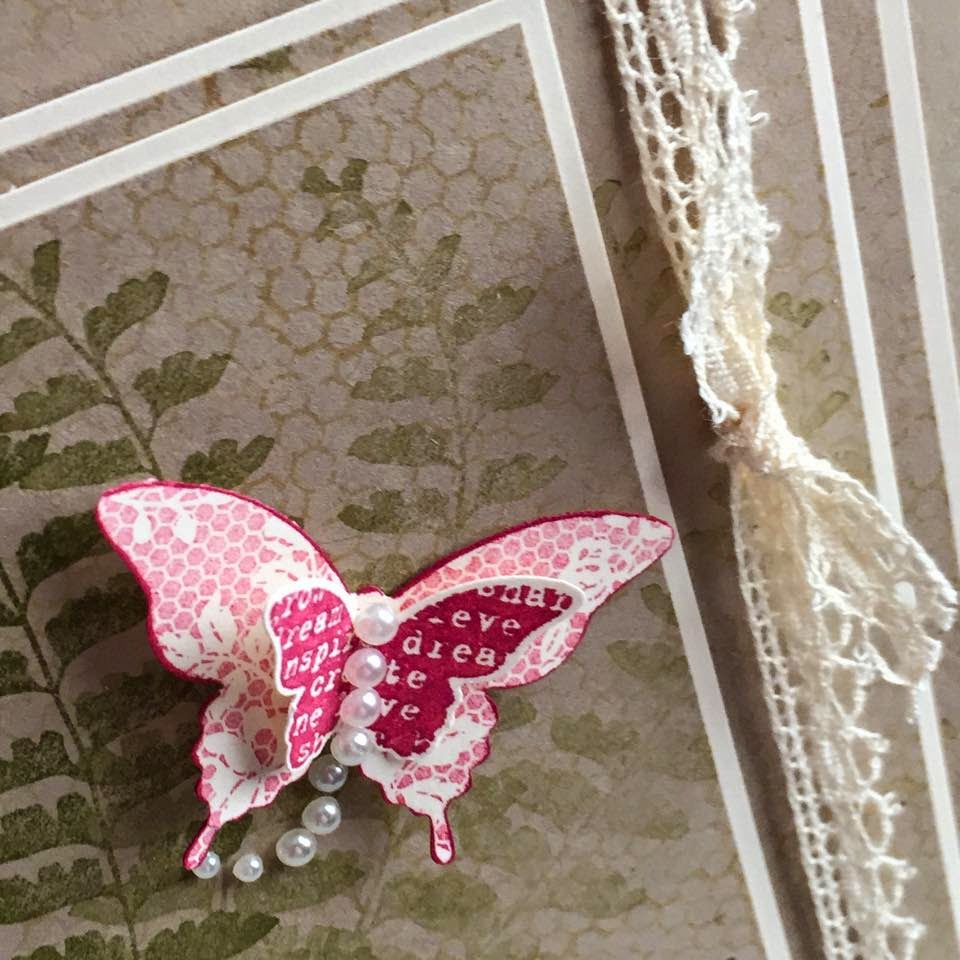
2/12 Stampin Up ~ Vintage Butterfly Basics and Butterly Punches, Mojo Monday

Hello Friends!

It's been a technology challenging type of morning here at my home.  So, I wanted a little bit of a getaway.  It's been a really long time since I've played along with Julee's sketches over at Mojo Monday. 

I always love her sketches.  They inspire me and I take great joy just following a template and having some fun with it. 

Here is a peek at Julee's Sketch:


Now that I'm really looking at it, I took some creative liberties with it.  What can I say, that's how I roll.  


How about some measurements? 

Base layer: crumb cake 5 1/2" x 8 1/2"
Layer 2: vanilla 5 1/8" 3 7/8"
Layer 3: is crumb cake 5 x 3 3/4"
Layer 4:vanilla 4 3/8 x 3 3/8"
Layer 5: crumb cake 4 1/4" x 3 1/4"
Layer 6: vanilla 4 x 2 5/8
Layer 7: Crumb cake 3 7/8" x 2 1/2
The butterflies came out of some of the vanilla layers below. 


I stamped the butterflies both in rose red,  for the darker one i used a marker, and the lighter one, an ink pad.  I also used a marker to brighten up the edges of my butterfly.  What do you think?


Thanks so much for stopping by today, if you need a shopping list, everything I used is at the bottom!  Happy Creating!  :)

Love,
Selene Kempton
Stampin' Up! Creative Coach

Thank you for your orders with me  Shop here anytime!
Click here to join my team


Built for Free Using: My Stampin Blog